![[C++项目] Boost文档 站内搜索引擎(5): cpphttplib实现网络服务、html页面实现、服务器部署...](https://dxyt-july-image.oss-cn-beijing.aliyuncs.com/202308081258103.webp)
[C++项目] Boost文档 站内搜索引擎(5): cpphttplib实现网络服务、html页面实现、服务器部署...
Table of Contents
在前四篇文章中, 我们实现了从文档文件的清理 到 搜索的所有内容:
- 项目背景: 🫦[C++项目] Boost文档 站内搜索引擎(1): 项目背景介绍、相关技术栈、相关概念介绍…
- 文档解析、处理模块
parser的实现: 🫦[C++项目] Boost文档 站内搜索引擎(2): 文档文本解析模块parser的实现、如何对文档文件去标签、如何获取文档标题… - 文档 正排索引与倒排索引 建立的接口的实现: 🫦[C++项目] Boost文档 站内搜索引擎(3): 建立文档及其关键字的正排 倒排索引、jieba库的安装与使用…
- 文档的 搜索功能 接口的实现: 🫦[C++项目] Boost文档 站内搜索引擎(4): 实现搜索的相关接口、线程安全的单例index接口、cppjieba分词库的使用…
- 建议先阅读上面四篇文章
后端的主要功能接口完成之后, 就可以结合网络将其设计为服务器 然后部署到网络上了
网络服务 Link to 网络服务
我们使用cpphttplib库 实现搜索引擎服务器. 所以要先安装cpphttplib库
cpphttplib Link to cpphttplib
使用cpphttplib时, gcc版本不能太低. 而CentOS 7默认的版本是4.8.5, 太低了. 所以安装使用cpphttplib之前, 要先升级gcc到至少7.x以上
gcc升级 Link to gcc 升级
我们将gcc升级到8.3.1. 非常的简单, 只需要一共6条指令 就可以完成:
12345678910# 安装 centos-release-scl
sudo yum install centos-release-scl
# 安装 devtoolset-8-gcc* (gcc8相关软件包)
sudo yum install devtoolset-8-gcc*
# 安装完成, 需要建立软连接
mv /usr/bin/gcc /usr/bin/gcc-4.8.5
ln -s /opt/rh/devtoolset-8/root/bin/gcc /usr/bin/gcc
mv /usr/bin/g++ /usr/bin/g++-4.8.5
ln -s /opt/rh/devtoolset-8/root/bin/g++ /usr/bin/g++
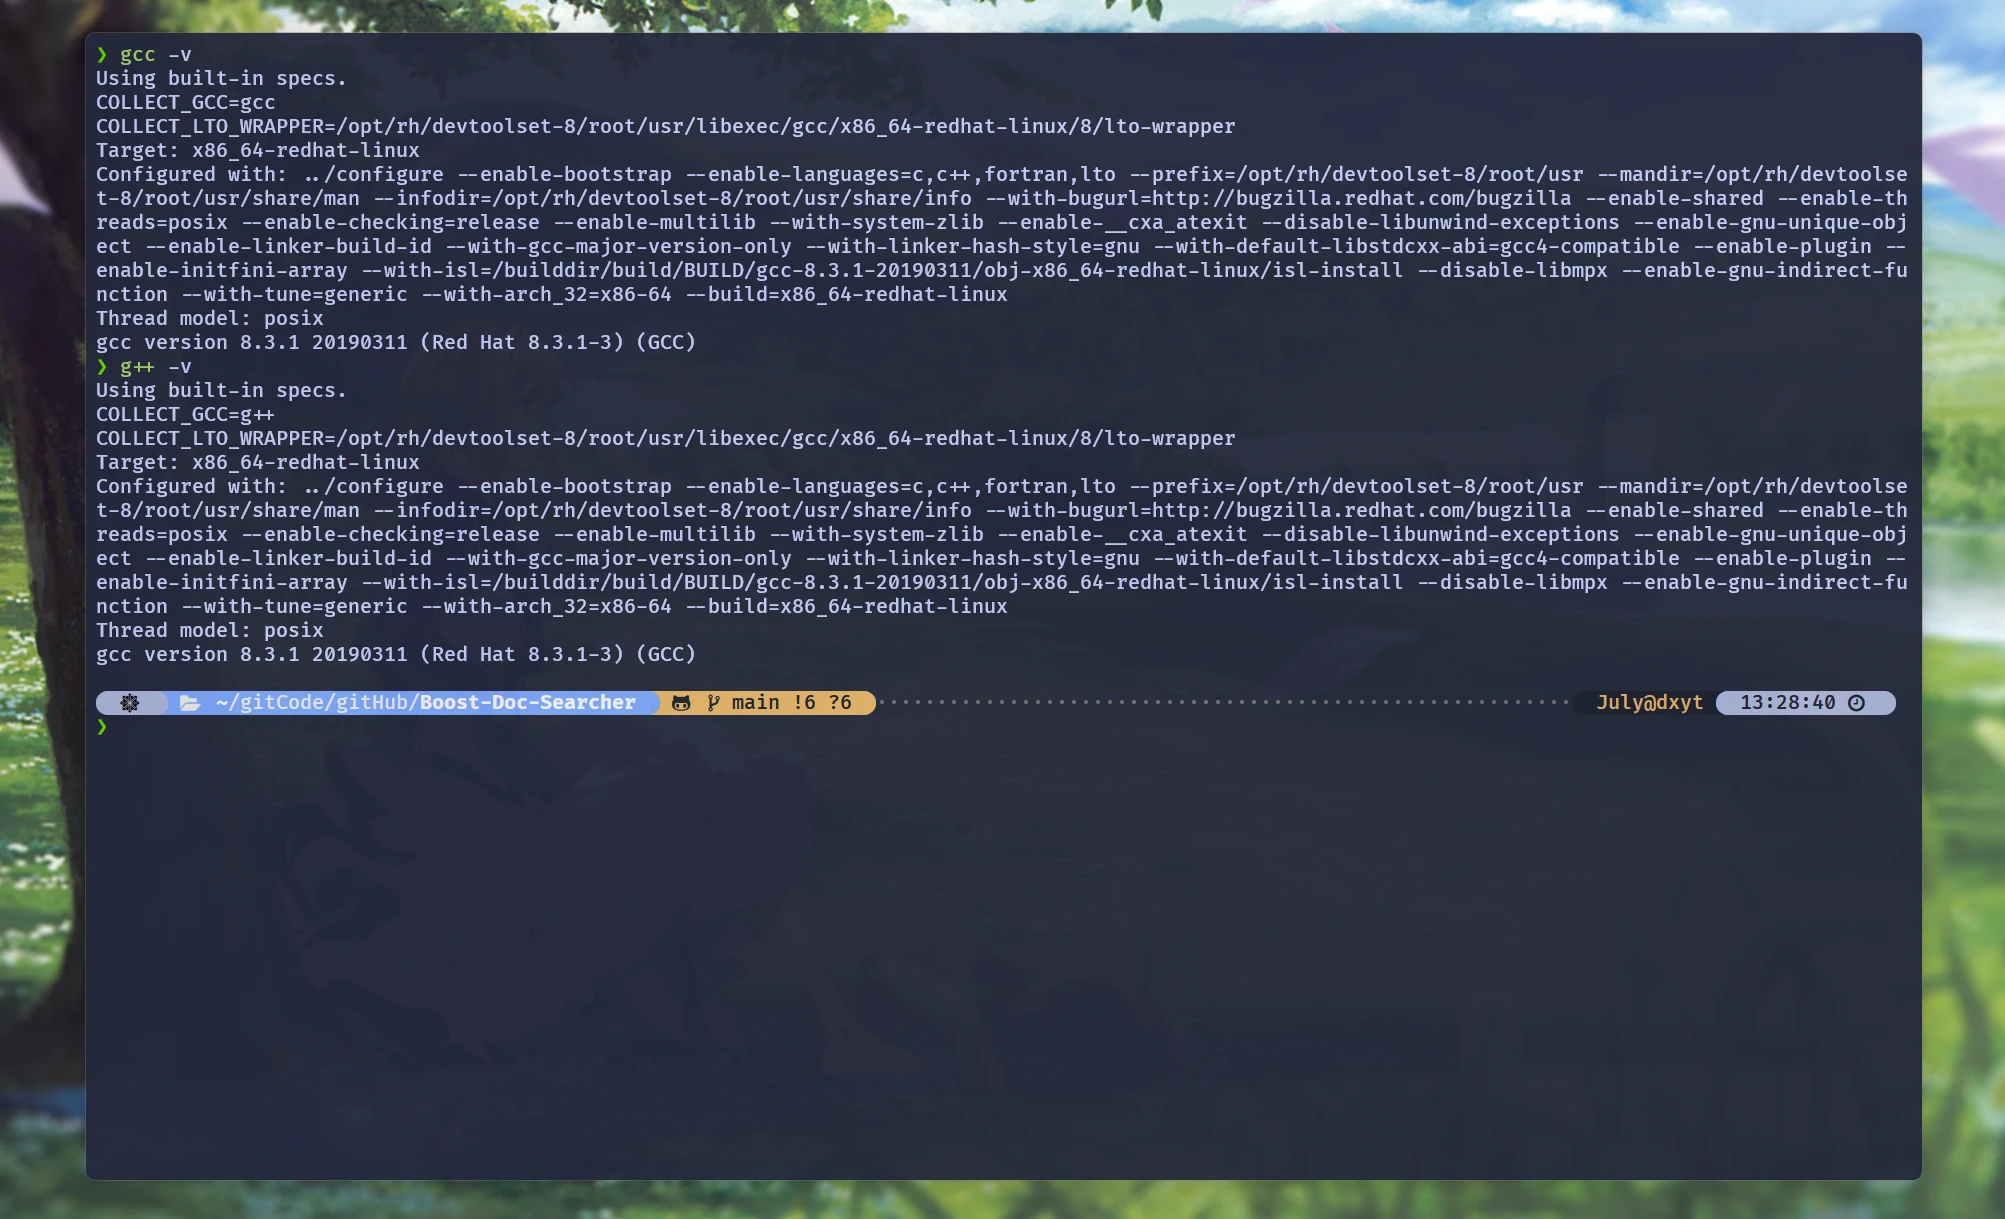
然后就可以看到:
12345678910111213141516❯ gcc -v
Using built-in specs.
COLLECT_GCC=gcc
COLLECT_LTO_WRAPPER=/opt/rh/devtoolset-8/root/usr/libexec/gcc/x86_64-redhat-linux/8/lto-wrapper
Target: x86_64-redhat-linux
Configured with: ../configure --enable-bootstrap --enable-languages=c,c++,fortran,lto --prefix=/opt/rh/devtoolset-8/root/usr --mandir=/opt/rh/devtoolset-8/root/usr/share/man --infodir=/opt/rh/devtoolset-8/root/usr/share/info --with-bugurl=http://bugzilla.redhat.com/bugzilla --enable-shared --enable-threads=posix --enable-checking=release --enable-multilib --with-system-zlib --enable-__cxa_atexit --disable-libunwind-exceptions --enable-gnu-unique-object --enable-linker-build-id --with-gcc-major-version-only --with-linker-hash-style=gnu --with-default-libstdcxx-abi=gcc4-compatible --enable-plugin --enable-initfini-array --with-isl=/builddir/build/BUILD/gcc-8.3.1-20190311/obj-x86_64-redhat-linux/isl-install --disable-libmpx --enable-gnu-indirect-function --with-tune=generic --with-arch_32=x86-64 --build=x86_64-redhat-linux
Thread model: posix
gcc version 8.3.1 20190311 (Red Hat 8.3.1-3) (GCC)
❯ g++ -v
Using built-in specs.
COLLECT_GCC=g++
COLLECT_LTO_WRAPPER=/opt/rh/devtoolset-8/root/usr/libexec/gcc/x86_64-redhat-linux/8/lto-wrapper
Target: x86_64-redhat-linux
Configured with: ../configure --enable-bootstrap --enable-languages=c,c++,fortran,lto --prefix=/opt/rh/devtoolset-8/root/usr --mandir=/opt/rh/devtoolset-8/root/usr/share/man --infodir=/opt/rh/devtoolset-8/root/usr/share/info --with-bugurl=http://bugzilla.redhat.com/bugzilla --enable-shared --enable-threads=posix --enable-checking=release --enable-multilib --with-system-zlib --enable-__cxa_atexit --disable-libunwind-exceptions --enable-gnu-unique-object --enable-linker-build-id --with-gcc-major-version-only --with-linker-hash-style=gnu --with-default-libstdcxx-abi=gcc4-compatible --enable-plugin --enable-initfini-array --with-isl=/builddir/build/BUILD/gcc-8.3.1-20190311/obj-x86_64-redhat-linux/isl-install --disable-libmpx --enable-gnu-indirect-function --with-tune=generic --with-arch_32=x86-64 --build=x86_64-redhat-linux
Thread model: posix
gcc version 8.3.1 20190311 (Red Hat 8.3.1-3) (GCC)
安装cpphttplib Link to 安装 cpphttplib
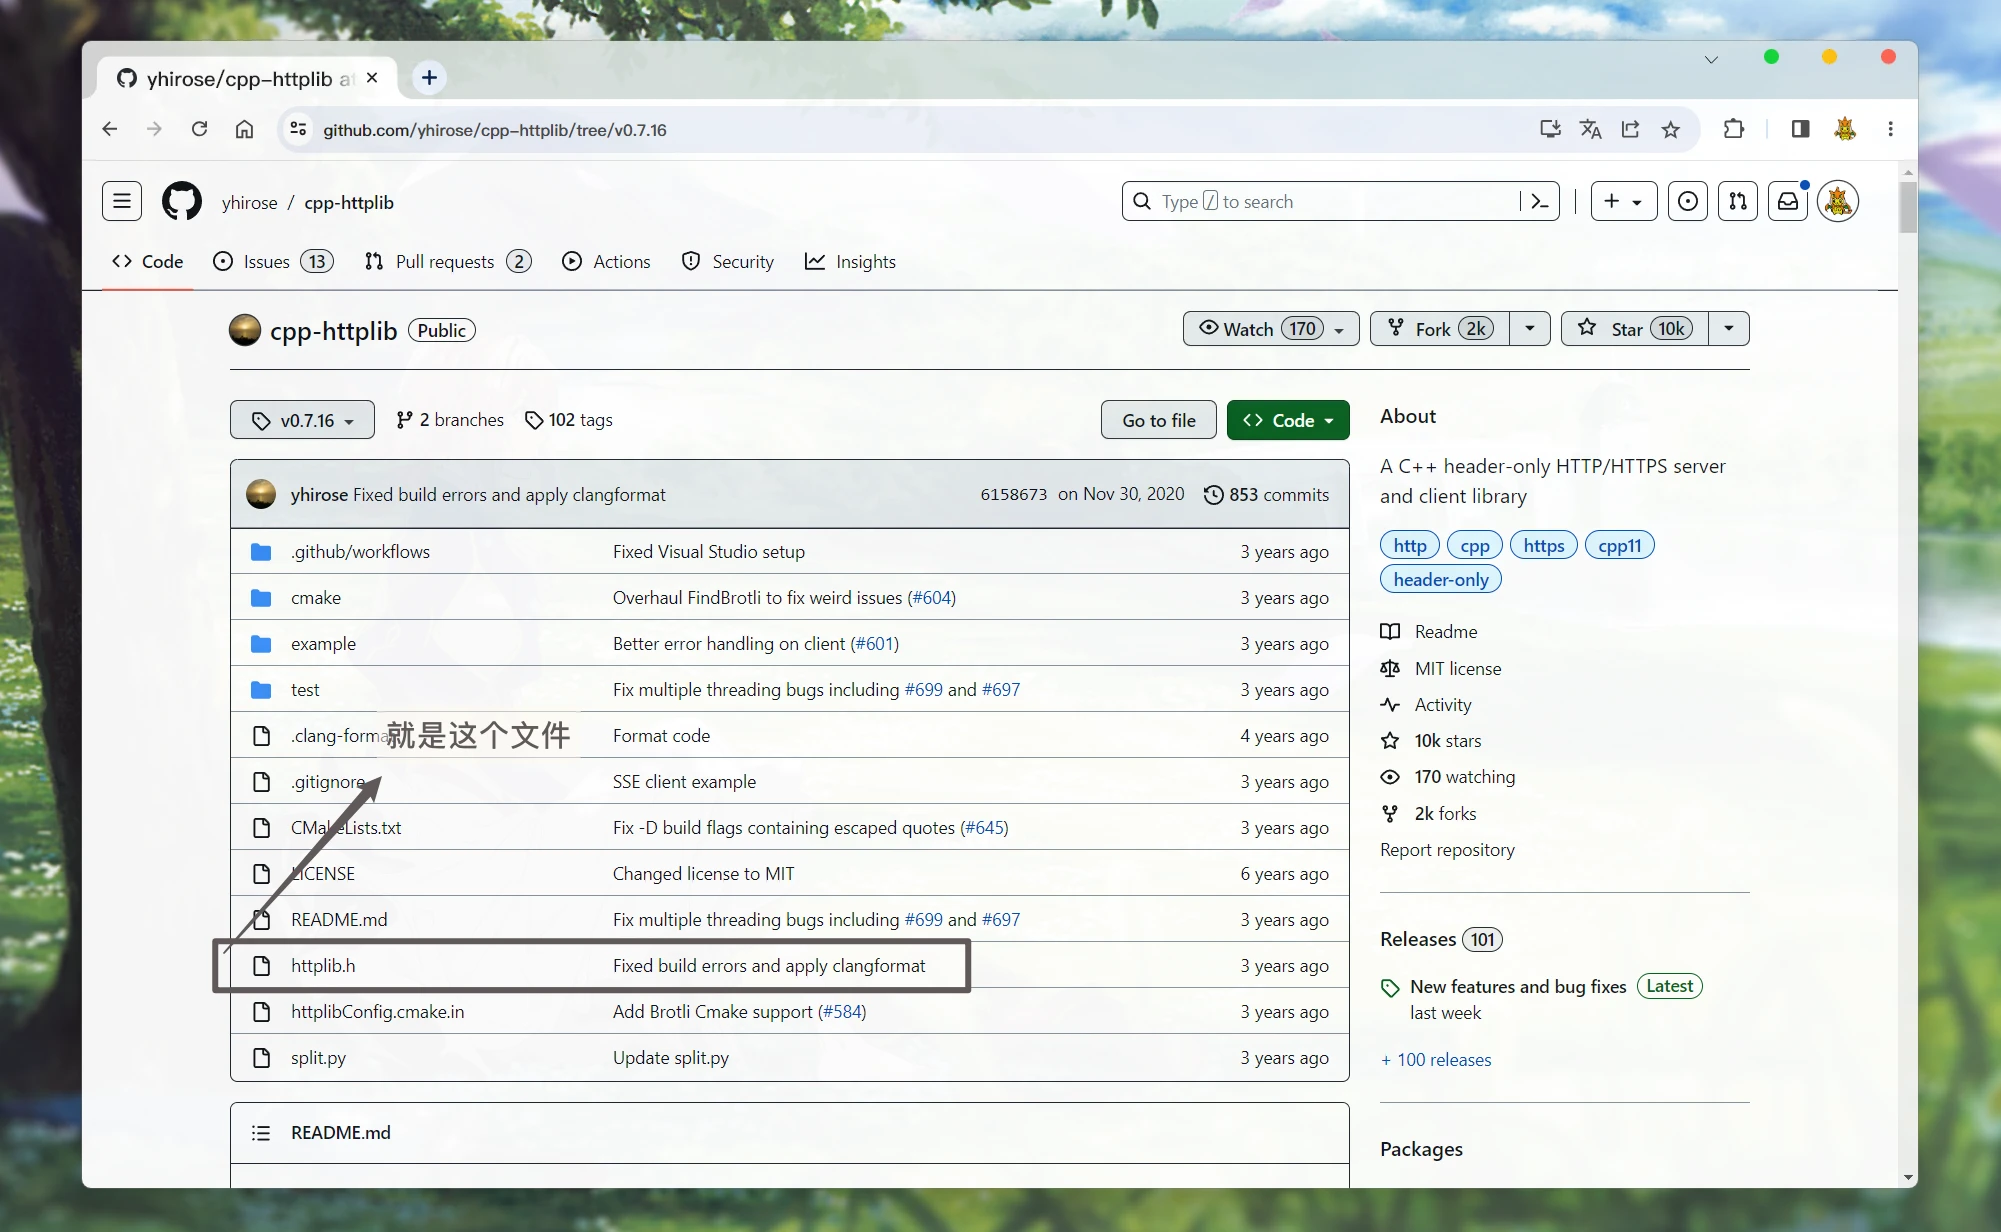
cpphttplib库的安装非常简单, 因为整个库中 只需要用到一个httplib.h的头文件.
但是, 我们需要选择版本安装, 不能直接安装最新版的. 因为gcc编译器版本不匹配的话 可能 会出现无法编译或运行时错误的情况
这里推荐0.7.16的版本: https://github.com/yhirose/cpp-httplib/tree/v0.7.16
可以直接获取此版本的源码:
1❯ wget https://codeload.github.com/yhirose/cpp-httplib/zip/refs/tags/v0.7.16
然后解压出来, 将httplib.h拷贝到项目目录下:
12345678910111213141516171819202122232425❯ wget https://codeload.github.com/yhirose/cpp-httplib/zip/refs/tags/v0.7.16
--2023-08-08 14:24:23-- https://codeload.github.com/yhirose/cpp-httplib/zip/refs/tags/v0.7.16
Resolving codeload.github.com (codeload.github.com)... 20.205.243.165
Connecting to codeload.github.com (codeload.github.com)|20.205.243.165|:443... connected.
HTTP request sent, awaiting response... 200 OK
Length: unspecified [application/zip]
Saving to: ‘v0.7.16’
[ <=> ] 586,948 1.10MB/s in 0.5s
2023-08-08 14:24:25 (1.10 MB/s) - ‘v0.7.16’ saved [586948]
❯ unzip v0.7.16
Archive: v0.7.16
... 解压过程
extracting: cpp-httplib-0.7.16/test/www3/dir/test.html
❯ ll
total 588K
drwxr-xr-x 6 July July 4.0K Nov 30 2020 cpp-httplib-0.7.16
drwxr-xr-x 9 July July 4.0K Aug 7 00:16 cppjieba
drwxr-xr-x 6 July July 4.0K Aug 8 13:52 gitHub
-rw-r--r-- 1 July July 574K Aug 8 14:24 v0.7.16
# 将httplib.h 拷贝到项目目录下:
cp cpp-httplib-0.7.16/httplib.h gitHub/Boost-Doc-Searcher/.

这就算在项目中安装成功了
cpphttplib的简单使用 Link to cpphttplib 的简单使用
关于cpphttplib的使用, Github文档有简单的使用介绍
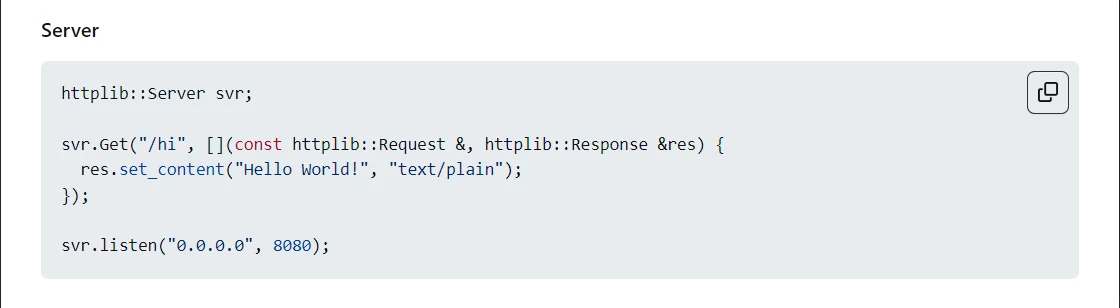
直接使用这段代码 可以实现怎么样的结果呢?
1234567891011121314151617#include <iostream>
#include <pthread.h>
#include "httplib.h"
// 由于库中使用了线程相关接口, 所以要包含线程头文件
int main() {
httplib::Server svr;
svr.Get("/hi", [](const httplib::Request&, httplib::Response& res) {
res.set_content("Hello World!", "text/plain");
});
svr.listen("0.0.0.0", 8080);
return 0;
}
直接访问根url, 没有任何响应. 但是如果我们在url之后添加/hi. 就能看到Hello World!的字样.
这就是我们设定的 申请/hi资源时, 会响应的内容:

httplib::Server::Get()是用来处理HTTP的GET方法的接口.
第一个参数, 用来指定处理 申请某内容的请求.
如果传入
/hi, 就会处理 请求的url是wwwRoot/hi的请求. 如果传入/index.html, 就会处理 请求的url是wwwRoot/hi的请求wwwRoot表示web根目录, 没有设置 即为服务器运行路径第二个参数, 是一个回调函数 用来 接收请求 对请求进行处理, 并响应
此回调函数的第一个参数 就是用来接收请求的.
第二个参数, 可以看作一个输出型参数. 是用来填充响应的
在例子中, 使用
httplib::Response::set_content(), 接口设置响应正文以及相应的类型
最后监听指定端口, 就可以通过ip:port的形式访问服务器.
项目网络服务 ** Link to 项目网络服务 **
了解了cpphttplib的最基本使用. 就可以为项目创建网络服务了
但是, 创建网络服务之前. 可以先了解一下 搜索引擎的搜索结果是怎么出现的?

当我们搜索时, 会申请/search这个服务. 并携带了?q=Searcher这个key(q)=value(Searcher)属性.
然后, 就会将搜索结果显示出来.
而cpphttplib提供了检索url中是否存在key的接口, 并且可以通过key获取value值的接口, 所以我们就可以这样来向页面设置内容:
1234567svr.Get("/search", [](const httplib::Request& request, httplib::Response& response) {
if (!request.has_param("word")) {
// url中没有 word 键值
// set_content() 第一个参数是设置正文内容, 第二个参数是 正文内容类型等属性
response.set_content("请输入内容后搜索", "text/plain; charset=utf-8");
}
});
然后运行服务器并访问/search:

当url中没有key为word的键值时, 就会显示 请输入内容后搜索
如果有key为word的键值, 因为我们没有做任何操作, 所以不会有任何内容:

除了判断是否存在key, 还可以通过接口获得对应的value:
123456789svr.Get("/search", [](const httplib::Request& request, httplib::Response& response) {
if (!request.has_param("word")) {
// url中没有 word 键值
// set_content() 第一个参数是设置正文内容, 第二个参数是 正文内容类型等属性
response.set_content("请输入内容后搜索", "text/plain; charset=utf-8");
}
std::string word = request.get_param_value("word");
response.set_content(word, "text/plain; charset=utf-8");
});
此时, 再携带key=value键对:

就获取到了value的内容, 并设置为了响应内容.
既然可以获取url中的键值, 那么 就可以实现根据键值调用searcher::search()接口, 搜索相关文档:
12345678910111213141516171819202122232425262728293031323334#include <iostream>
#include <pthread.h>
#include "util.hpp"
#include "searcher.hpp"
#include "httplib.h"
const std::string& input = "./data/output/raw";
int main() {
ns_searcher::searcher searcher;
searcher.initSearcher(input);
httplib::Server svr;
svr.Get("/s", [&searcher](const httplib::Request& request, httplib::Response& response {
if (!request.has_param("word")) {
// url中没有 word 键值
// set_content() 第一个参数是设置正文内容, 第二个参数是 正文内容类型等属性
response.set_content("请输入内容后搜索", "text/plain; charset=utf-8");
}
std::string searchContent = request.get_param_value("word");
std::cout << "User search:: " << searchContent << std::endl;
std::string searchJsonResult;
searcher.search(searchContent, &searchJsonResult);
// 搜获取到搜索结果之后 设置相应内容
response.set_content(searchJsonResult, "application/json");
});
std::cout << "服务器启动成功..." << std::endl;
svr.listen("0.0.0.0", 8080);
return 0;
}
编译代码 g++ httpServer.cc -lpthread -ljsoncpp
运行程序. 建立索引 等待服务器开启成功之后:
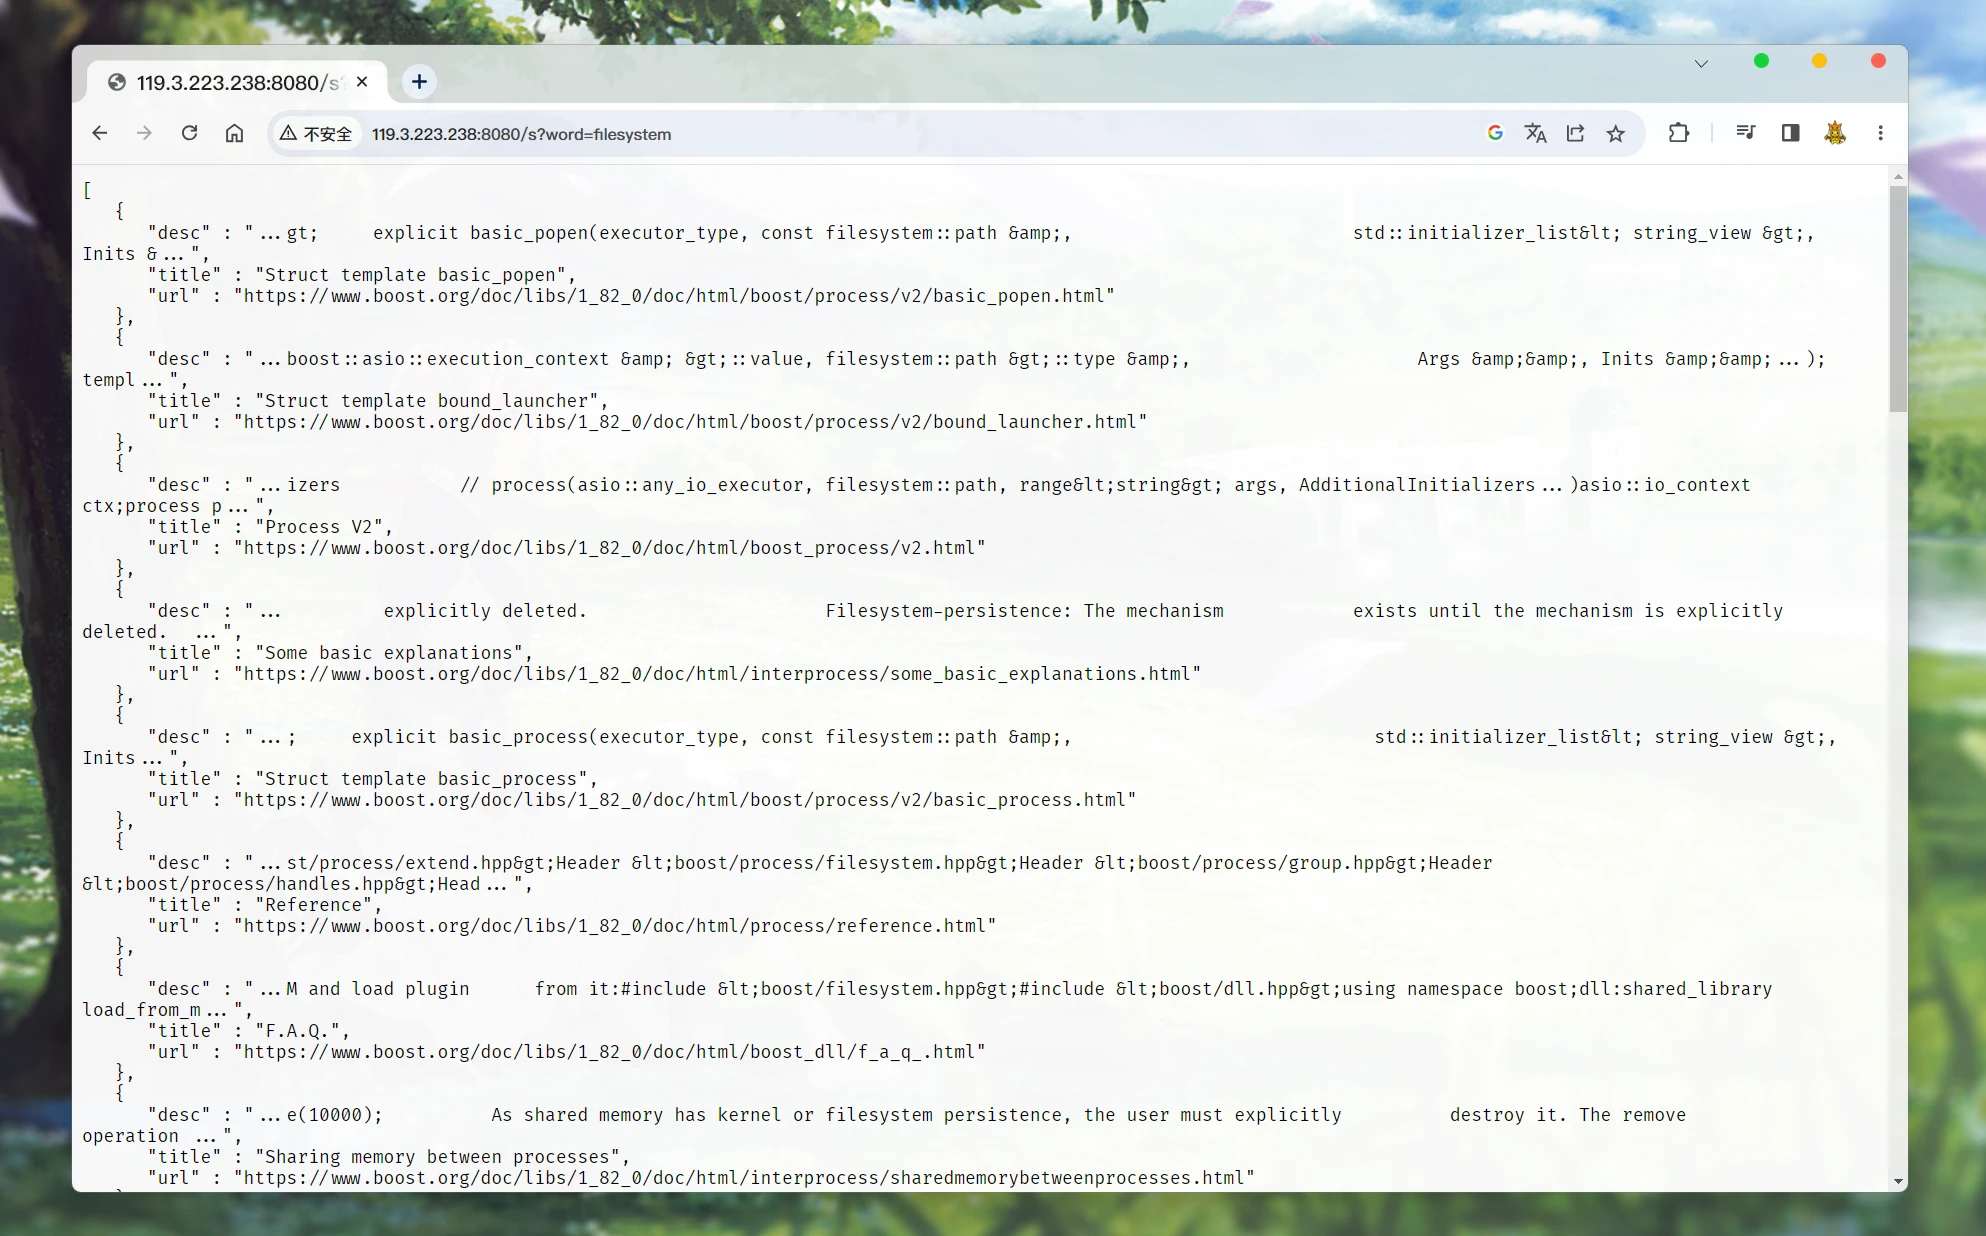
直接在url添加键值 就可以看到直接的搜索结果.
至此, 网络服务的编写就完成了.
下面要做的, 就是通过网页发送请求, 并根据响应构建结果网页.
网页构建 Link to 网页构建
由于博主没有学过前端的代码, 所以做出来的网页只是能用. 也没有能力去解释一些原理或底层的实现. 只能介绍一下基本功能
所以, 直接列出代码:
./wwwRoot/index.html:
123456789101112131415161718192021222324252627282930313233343536373839404142434445464748495051525354555657585960616263646566676869707172737475767778798081828384858687888990919293949596979899100101102103104105106107108109110111112113114115116117118119120121122123124125126127128129130131132133134135136137138139140141142143144145146147148149150151152153154155156157158159160161162163164165166167168169170171172173174175176177178179180181182183184185186187188189190191192193194195196197198199200201202203204205206207208209210211212213214215216217218219220221222223224225226227228229230231232233234235236237238239240<!doctype html>
<html lang="en">
<head>
<meta charset="UTF-8" />
<meta name="viewport" content="width=device-width, initial-scale=1.0" />
<script src="http://code.jquery.com/jquery-2.1.1.min.js"></script>
<link rel="icon" type="image/svg+xml" href="/favicon.svg" />
<title>Boost库 文档搜索</title>
<style>
/* 去掉网页中的所有的默认内外边距, html的盒子模型 */
* {
background-color: #f5f5f7;
/* 设置外边距 */
margin: 0;
/* 设置内边距 */
padding: 0;
}
/* 将我们的body内的内容100%和html的呈现吻合 */
html,
body {
height: 100%;
}
/* 类选择器.container */
.container {
text-align: center;
/* 设置div的宽度 */
width: 800px;
/* 通过设置外边距达到居中对齐的目的 */
margin: 0px auto;
/* 设置外边距的上边距, 保持元素和网页的上部距离 */
margin-top: 100px;
}
/* 复合选择器, 选中container 下的 search */
.container .search {
/* 宽度与父标签保持一致 */
width: auto;
/* 高度设置为52px */
height: 52px;
}
.container .result {
margin-top: 30px;
text-align: left;
width: 100%;
}
.container .result .item {
height: auto;
border-radius: 13px;
background-color: #fff;
box-shadow: 0 0 5px rgb(0, 0, 0, 0.2);
margin-top: 15px;
padding-bottom: 10px;
padding-top: 10px;
}
.container .result .item a {
margin-left: 10px;
margin-right: 10px;
/* 设置为块级元素, 单独站一行 */
display: block;
background-color: #fff;
/* a标签的下划线去掉 */
text-decoration: none;
/* 设置a标签中的文字的字体大小 */
font-size: 20px;
/* 设置字体的颜色 */
color: #4e6ef2;
word-break: break-all;
}
.container .result .item a:hover {
/*设置鼠标放在a之上的动态效果*/
text-decoration: underline;
}
.container .result .item p {
margin-left: 10px;
margin-top: 10px;
margin-right: 10px;
display: block;
background-color: #fff;
font-size: 16px;
word-break: break-all;
font-family: "Lucida Sans", "Lucida Sans Regular", "Lucida Grande",
"Lucida SansUnicode", Geneva, Verdana, sans-serif;
}
.container .result .item i {
margin-left: 10px;
margin-right: 10px;
/* 设置为块级元素, 单独站一行 */
display: block;
font-size: 12px;
/* 取消斜体风格 */
font-style: normal;
background-color: #fff;
color: gray;
word-break: break-all;
}
#INDEXBLOGS {
text-align: center;
width: 75%;
}
.search-box {
width: 666px;
margin: auto;
display: flex;
background-color: #fff;
align-items: center;
border: 1px solid #ddd;
border-radius: 25px;
height: 44px;
box-shadow: 0 0 5px rgb(0, 0, 0, 0.2);
}
.search-input {
flex: 1;
padding: 0 15px;
border: none;
background-color: #fff;
border: 0px solid #ddd;
border-radius: 25px;
font-size: 16px;
height: 43px;
}
.search-input:focus {
outline: none;
}
.search-button {
padding: 0 18px;
height: 100%;
border: none;
border-radius: 0 25px 25px 0;
background: #fef9f2;
color: #666;
font-size: 16px;
cursor: pointer;
}
.suggestion {
margin-bottom: 5px;
color: #000000;
font-size: 14px;
}
</style>
</head>
<body>
<div class="container">
<img
src="https://dxyt-july-image.oss-cn-beijing.aliyuncs.com/202308080011153.webp"
id="INDEXBLOGS"
/>
<p class="suggestion">
服务器配置原因, 若搜索结果过多 可能响应较慢, 请耐心等待哦~
</p>
<div class="search-box">
<input
type="text"
id="search-input"
class="search-input"
placeholder=""
/>
<button onclick="Search()" class="search-button">♥ Search</button>
</div>
 <div class="result">
     // 这里是展示搜索结果的地方
 </div>
</div>
<script>
    // 获取输入框元素
    const input = document.getElementById("search-input");

    // 输入框按键按下事件监听
    input.addEventListener("keydown", function (event) {
        // 判断按键为回车键
        if (event.keyCode === 13) {
            // 模拟按钮点击事件
            document.querySelector(".search-button").click();
        }
    });
    function Search() {
        // 是浏览器的一个弹出框
        // alert("hello js!");
        // 1. 提取数据, $可以理解成就是JQuery的别称
        let query = $(".container .search-input").val();
        console.log("query = " + query); //console是浏览器的对话框, 可以用来进行查看js数据

        //2. 发起http请求,ajax: 属于一个和后端进行数据交互的函数, JQuery中的
        $.ajax({
            type: "GET",
            url: "/s?word=" + query,
            success: function (data) {
                console.log(data);
                BuildHtml(data);
            },
        });
    }

    function BuildHtml(data) {
        // 获取html中的result标签
        let result_lable = $(".container .result");
        // 清空历史搜索结果
        result_lable.empty();

        for (let elem of data) {
            // console.log(elem.title);
            // console.log(elem.url);
            let a_lable = $("<a>", {
                text: elem.title,
                href: elem.url,
                // 跳转到新的页面
                target: "_blank",
            });
            let i_lable = $("<i>", {
                text: elem.url,
            });
            let p_lable = $("<p>", {
                text: elem.desc,
            });
            let div_lable = $("<div>", {
                class: "item",
            });
            a_lable.appendTo(div_lable);
            i_lable.appendTo(div_lable);
            p_lable.appendTo(div_lable);
            div_lable.appendTo(result_lable);
        }
    }
</script>
</body>
</html>
这个html文件是创建在项目目录下的wwwRoot目录下的:

一个是页面
html文件, 一个是图标文件
大概解释一下这个html代码:
首先最外层 是
html最基本的框架:HTML1234567891011<!DOCTYPE html> <html lang="en"> <head> <meta charset="UTF-8"> <meta name="viewport" content="width=device-width, initial-scale=1.0"> <title></title> </head> <body> </body> </html><body> </body>之间的内容, 就是要在页面中显示的内容在
<body> </body>之间. 先设置了一个<div class="container"> </div>可以看作是在页面内容中设置了一个框架, 之后只要在这个
<div>内部的 都会显示在这个框架中然后
<div class="container"></div>内最主要的就是:- HTML123456789
<div class="search-box"> <input type="text" id="search-input" class="search-input" placeholder="" /> <button onclick="Search()" class="search-button">♥ Search</button> </div>又设置了一个
<div>并在其内部设置了:一个搜索框
<input type="text" id="search-input" class="search-input" placeholder="" />一个搜索按钮
<button onclick="Search()" class="search-button">♥ Search</button><button> </button>之间是按钮上显示的内容,onclick="Search()"表示点击按钮执行的函数 - HTML123
<div class="result"> // 这里是展示搜索结果的地方 </div>搜索框下面就是要展示的内容了
设置了
<div class="result"> </div>, 这个<div>内部就是展示搜索结果用的搜索结果用这个元素
item表示:HTML12345<div class="item"> <a href="" target="_blank">跳转标题</a> <i>url</i> <p>摘要</p> </div>
布局设置完毕之后, 就需要使用
JavaScriptJQueryajax来发送请求, 接收响应 和 设置搜索结果了HTML12345678910111213141516171819202122232425262728293031323334353637383940414243444546474849505152535455565758596061<script> // 获取输入框元素 const input = document.getElementById("search-input"); // 输入框按键按下事件监听 input.addEventListener("keydown", function (event) { // 判断按键为回车键 if (event.keyCode === 13) { // 模拟按钮点击事件 document.querySelector(".search-button").click(); } }); function Search() { // 是浏览器的一个弹出框 // alert("hello js!"); // 1. 提取数据, $可以理解成就是JQuery的别称 let query = $(".container .search-input").val(); console.log("query = " + query); //console是浏览器的对话框, 可以用来进行查看js数据 //2. 发起http请求,ajax: 属于一个和后端进行数据交互的函数, JQuery中的 $.ajax({ type: "GET", url: "/s?word=" + query, success: function (data) { console.log(data); BuildHtml(data); }, }); } function BuildHtml(data) { // 获取html中的result标签 let result_lable = $(".container .result"); // 清空历史搜索结果 result_lable.empty(); for (let elem of data) { // console.log(elem.title); // console.log(elem.url); let a_lable = $("<a>", { text: elem.title, href: elem.url, // 跳转到新的页面 target: "_blank", }); let i_lable = $("<i>", { text: elem.url, }); let p_lable = $("<p>", { text: elem.desc, }); let div_lable = $("<div>", { class: "item", }); a_lable.appendTo(div_lable); i_lable.appendTo(div_lable); p_lable.appendTo(div_lable); div_lable.appendTo(result_lable); } } </script><script> </script>内部, 首先设置了一个监听按键的函数. 为了实现 按下回车搜索然后就是
Search()函数, 获取search-input搜索框内的数据为query, 然后创建HTTP的GET方法请求, 并携带?word=query发送给服务器.然后成功接收到响应之后, 根据响应数据 执行
Build()函数 在<div class="result"></div>内部 设置item元素
编写完index.html之后, 需要在httpServer.cc主函数内, 将服务器的web根文件设置为./wwwRoot/index.html
123const std::string& rootPath = "./wwwRoot/index.html";
svr.set_base_dir(rootPath.c_str());
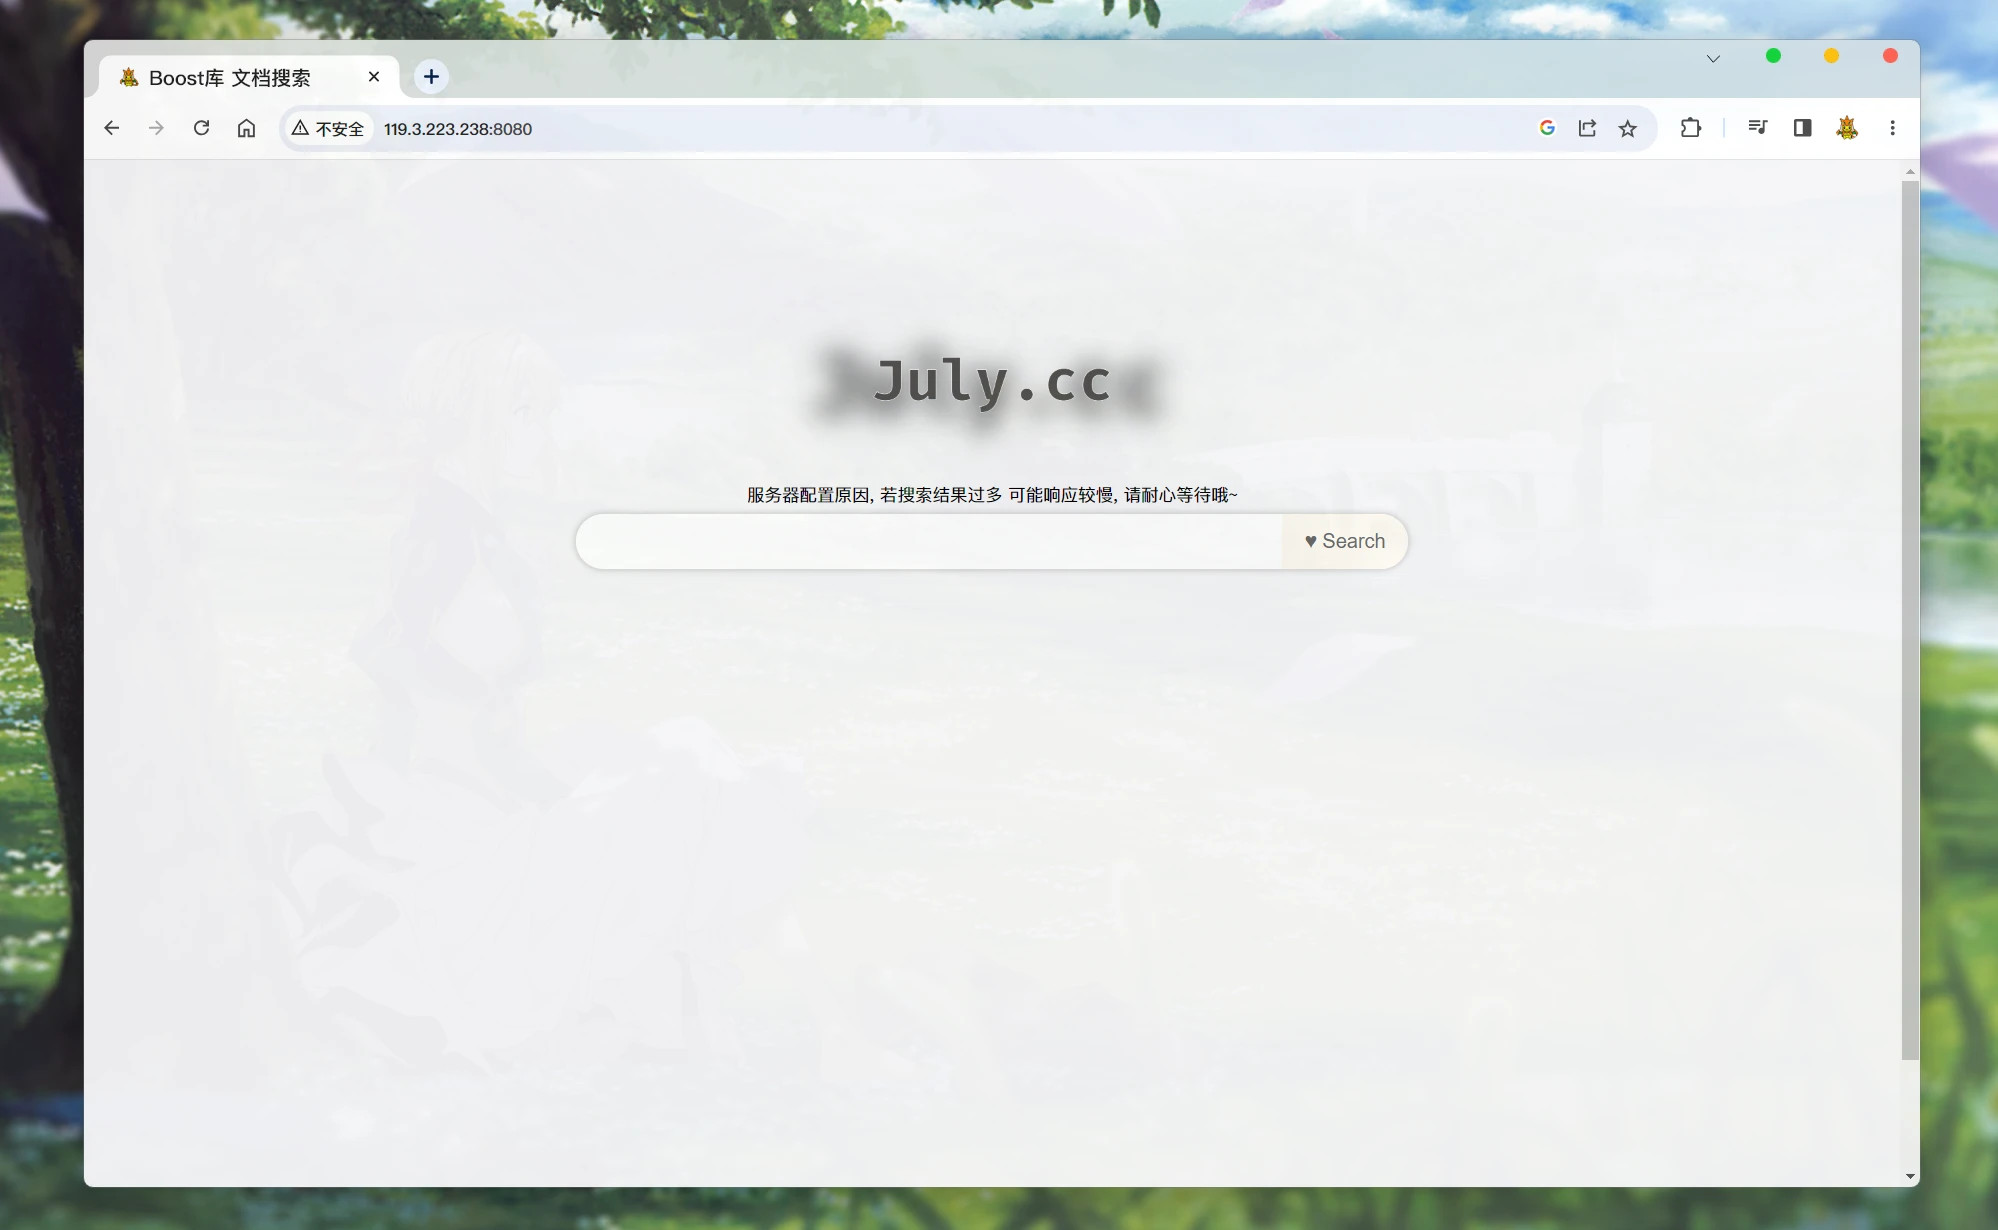
然后再编译运行服务器:
没有执行搜索的界面:
执行了搜索之后的界面:
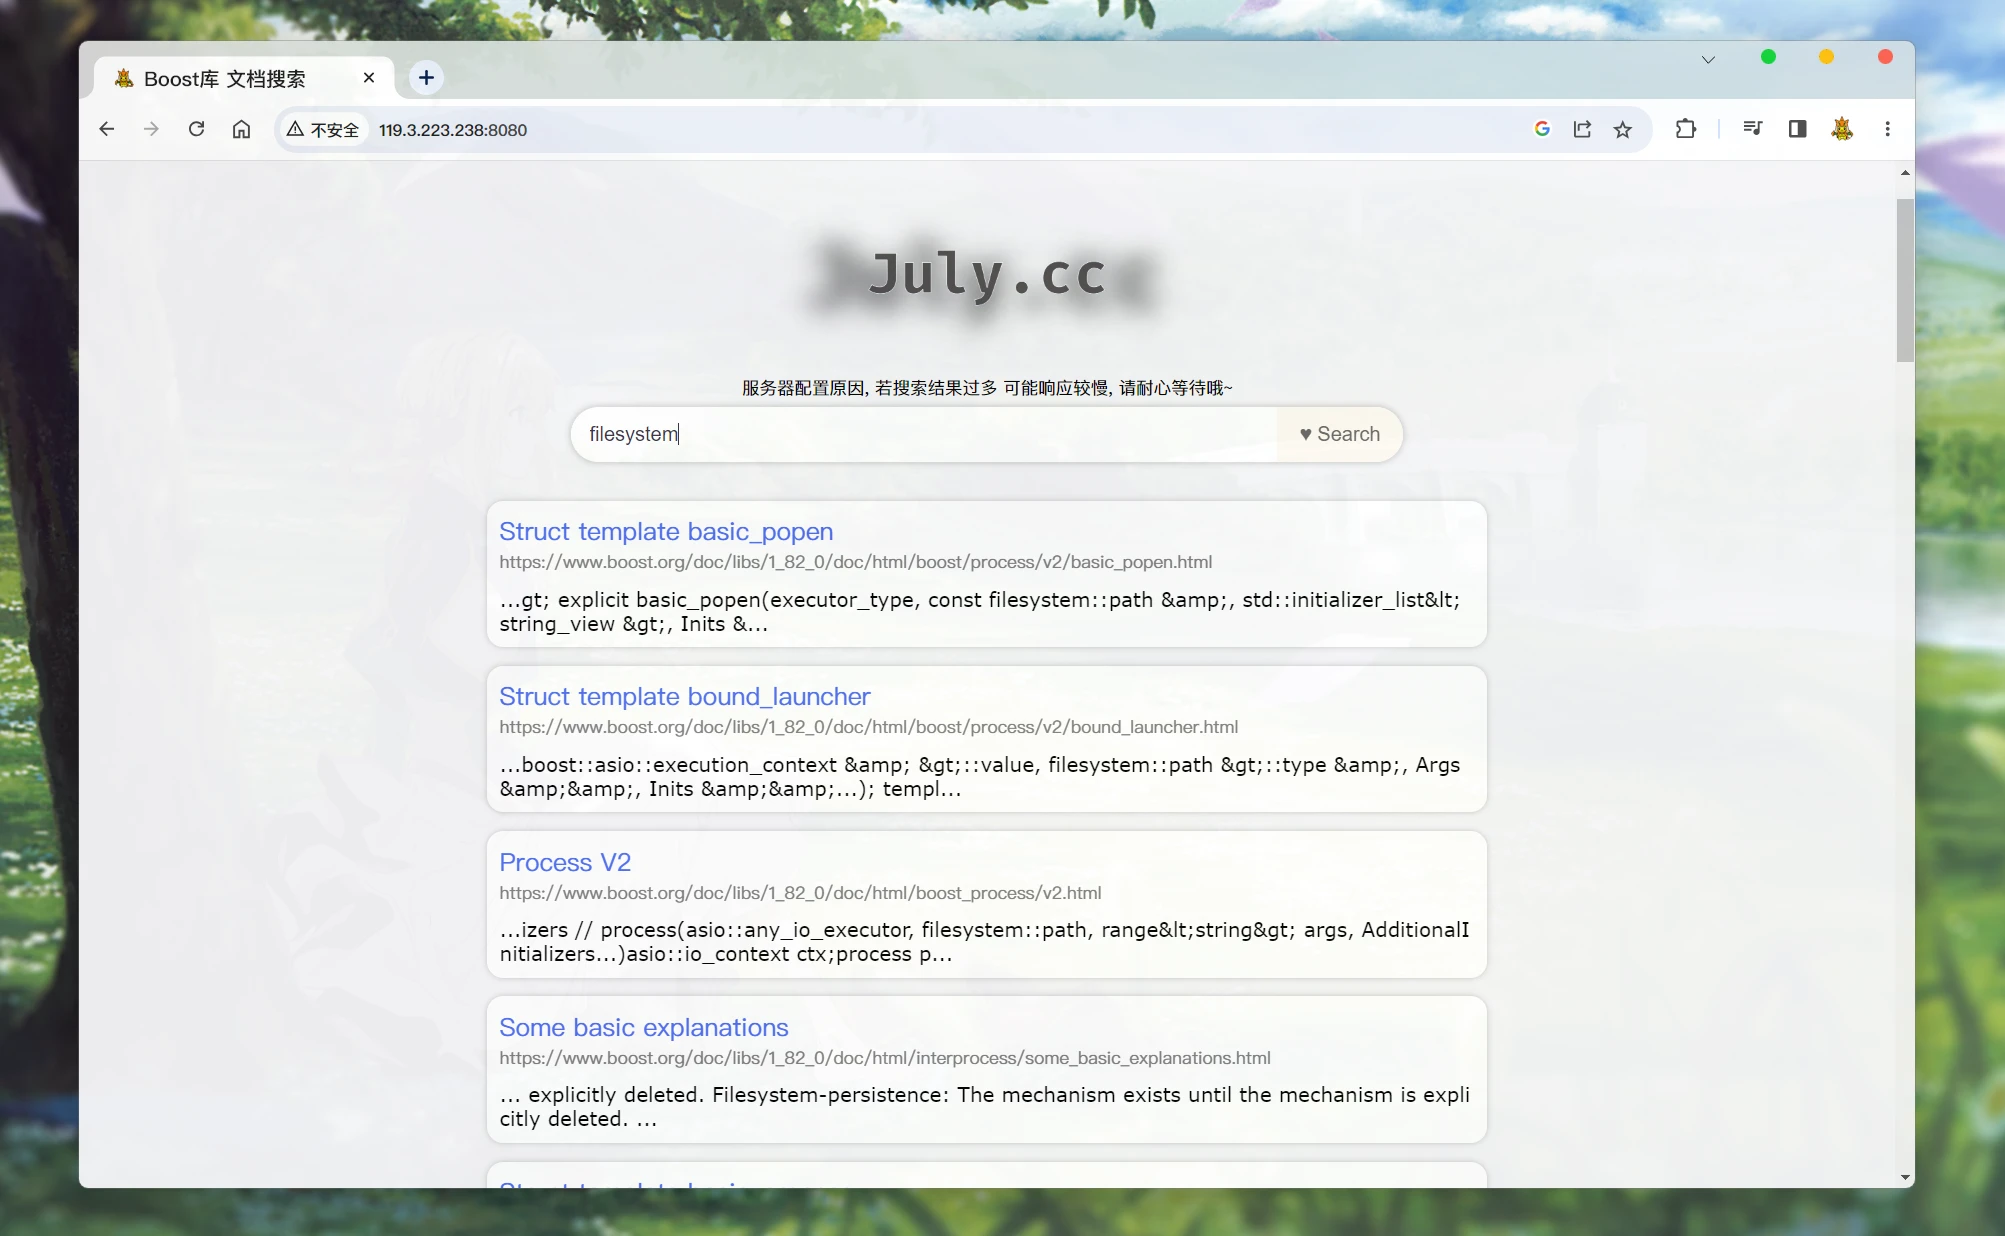
搜索结果, 都会按照权重一个个排列在下面
至此, 我们的Boost搜索引擎就可以使用了!
不过, 还有一些地方需要优化和修改
代码优化 Link to 代码优化
当前的搜索引擎还有问题:
没有搜索到内容时, 不会有任何反应. 可能会让用户认为服务器没有运作.
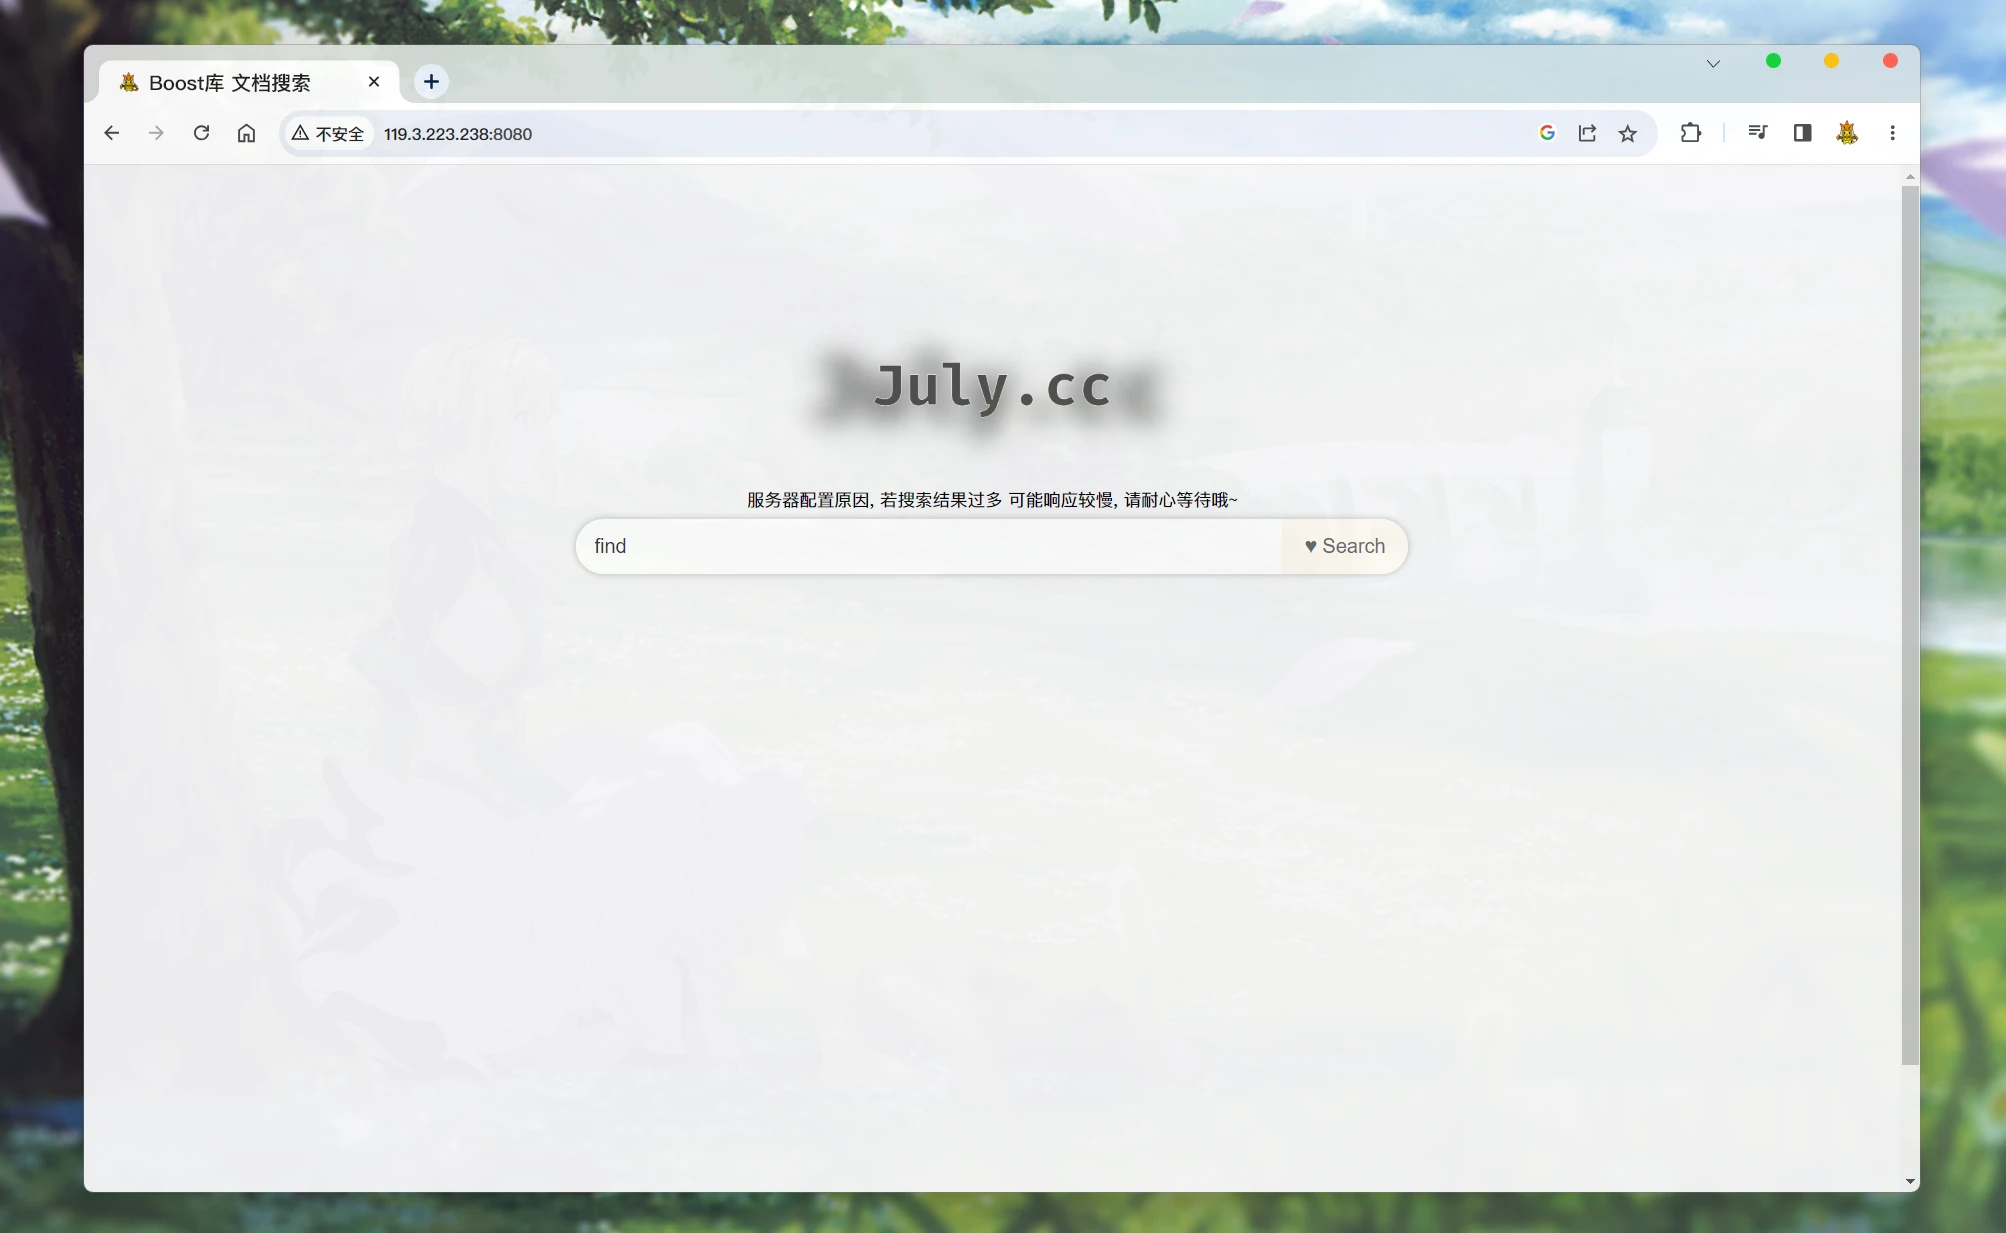
所以可以考虑在没有搜索到任何文档的时候, 响应一个没有任何内容的
item元素. 并实现, 点击标题 跳转回主页:CPP1234567891011121314151617181920212223242526272829303132333435363738/* searcher.hpp */ // 排序之后, allInvertedElemOut 中文档的排序就是倒序了 // 然后 通过遍历此数组, 获取文档id, 根据id获取文档在正排索引中的内容 // 然后再将 所有内容序列化 Json::Value root; if (allInvertedElemOut.empty()) { // 如果没有查找到一个文档 Json::Value elem; elem["url"] = "http://119.3.223.238:8080"; elem["title"] = "Search nothing!"; // 关于文档的内容, 搜索结果中是不展示文档的全部内容的, 应该只显示包含关键词的摘要, 点进文档才显示相关内容 // 而docInfo中存储的是文档去除标签之后的所有内容, 所以不能直接将 doc._content 存储到elem对应key:value中 elem["desc"] = "Search nothing!"; root.append(elem); // 处理url 都设置为无效值 } else { for (auto& elemOut : allInvertedElemOut) { // 通过Json::Value 对象, 存储文档内容 Json::Value elem; // 通过elemOut._docId 获取正排索引中 文档的内容信息 ns_index::docInfo_t* doc = _index->getForwardIndex(elemOut._docId); // elem赋值 elem["url"] = doc->_url; elem["title"] = doc->_title; // 关于文档的内容, 搜索结果中是不展示文档的全部内容的, 应该只显示包含关键词的摘要, 点进文档才显示相关内容 // 而docInfo中存储的是文档去除标签之后的所有内容, 所以不能直接将 doc._content 存储到elem对应key:value中 elem["desc"] = getDesc(doc->_content, elemOut._keywords[0]); // 只根据第一个关键词来获取摘要 // for Debug // 这里有一个bug, jsoncpp 0.10.5.2 是不支持long或long long 相关类型的, 所以需要转换成 double // 这里转换成 double不会有什么影响, 因为这两个参数只是本地调试显示用的. elem["docId"] = (double)doc->_docId; elem["weight"] = (double)elemOut._weight; root.append(elem); } }此时, 搜索不到内容:
点击就会跳转至主页.
可能没有标题:
当搜索到的文章没有标题时, 就不会显示出来. 显示不出来也就无法通过标题跳转至指定的页面:
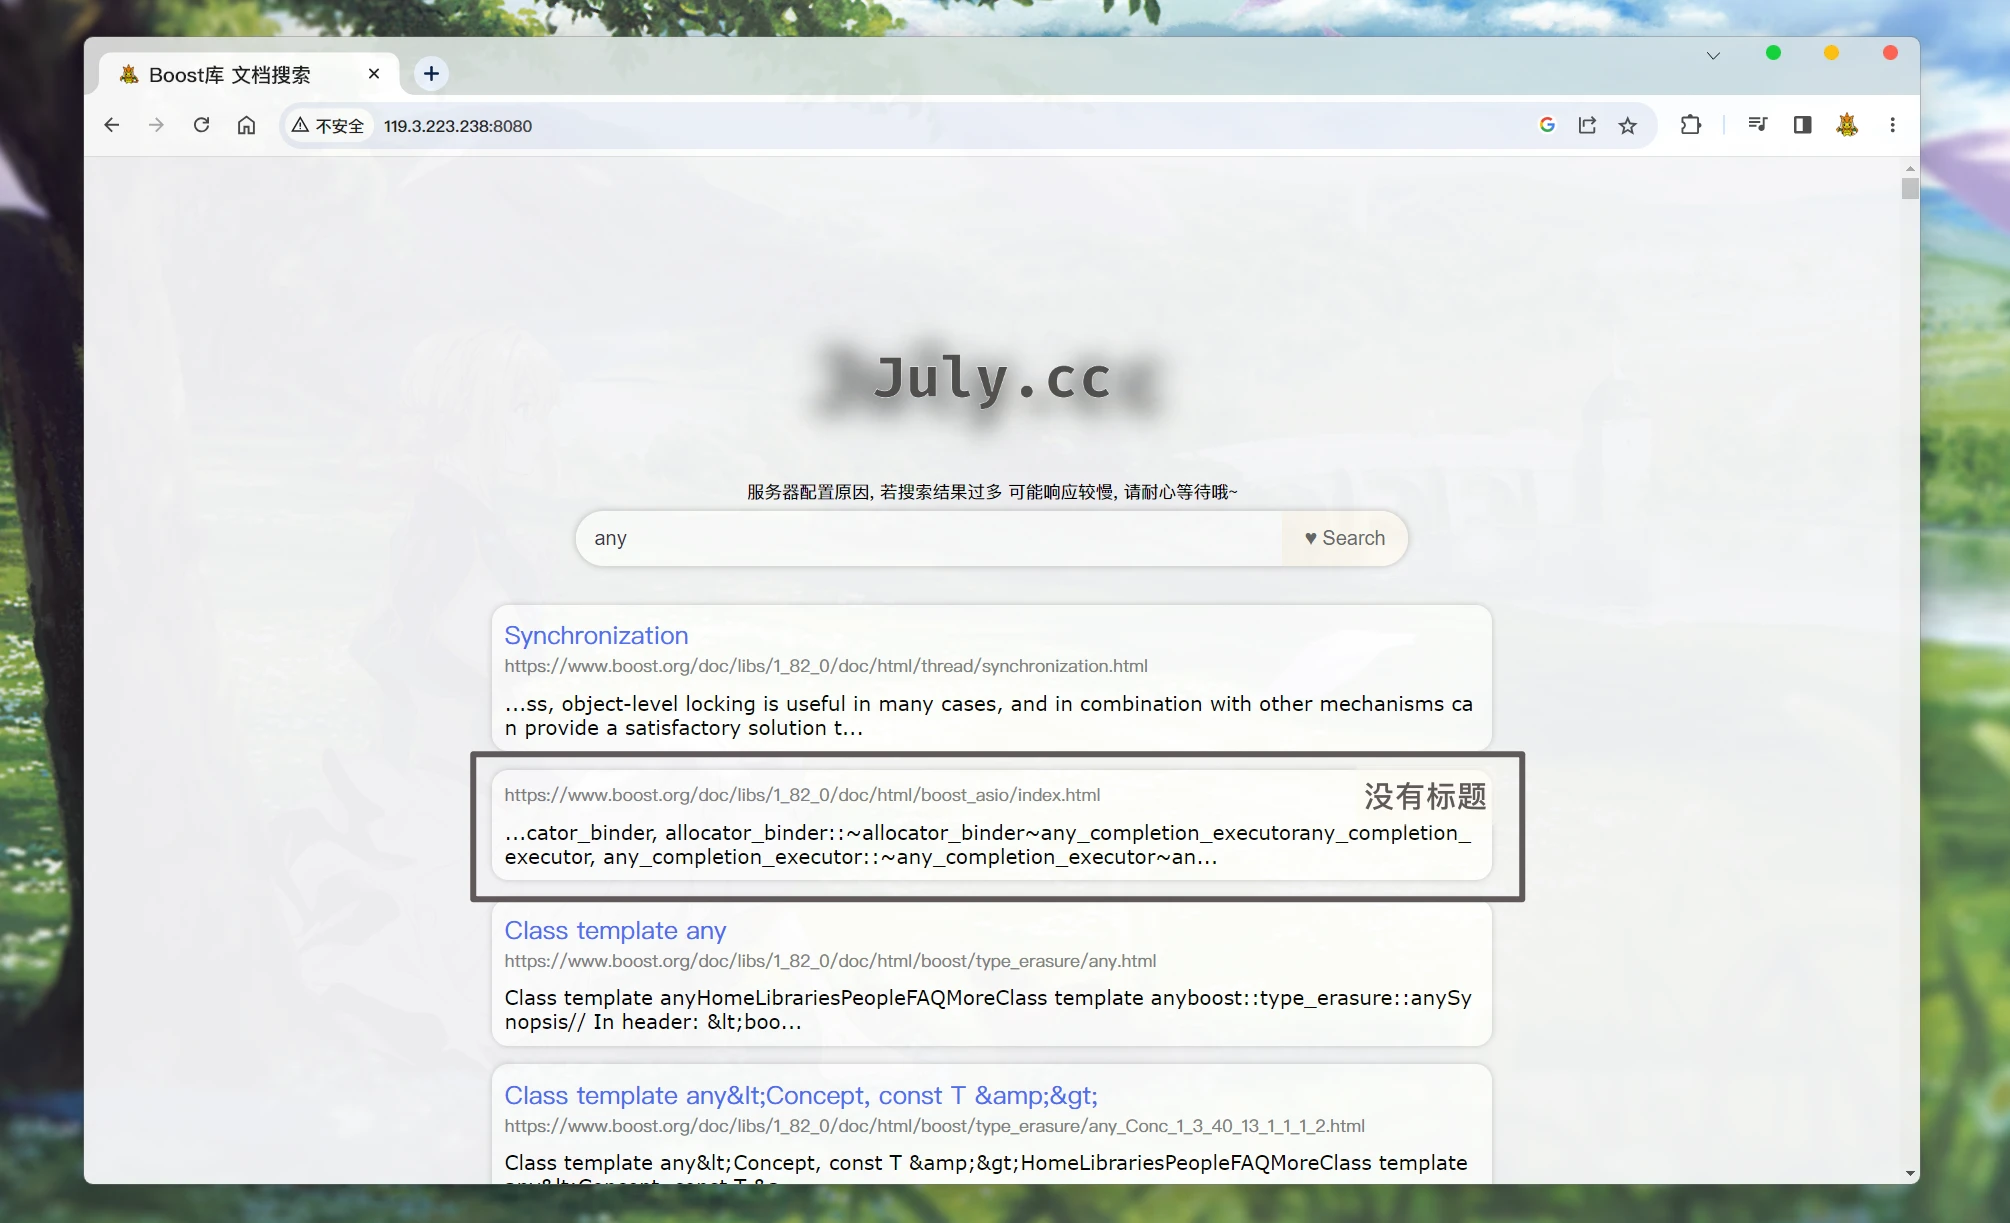
为什么没有标题呢? 不是因为出错了, 是因为 这篇文章本身就没有标题:

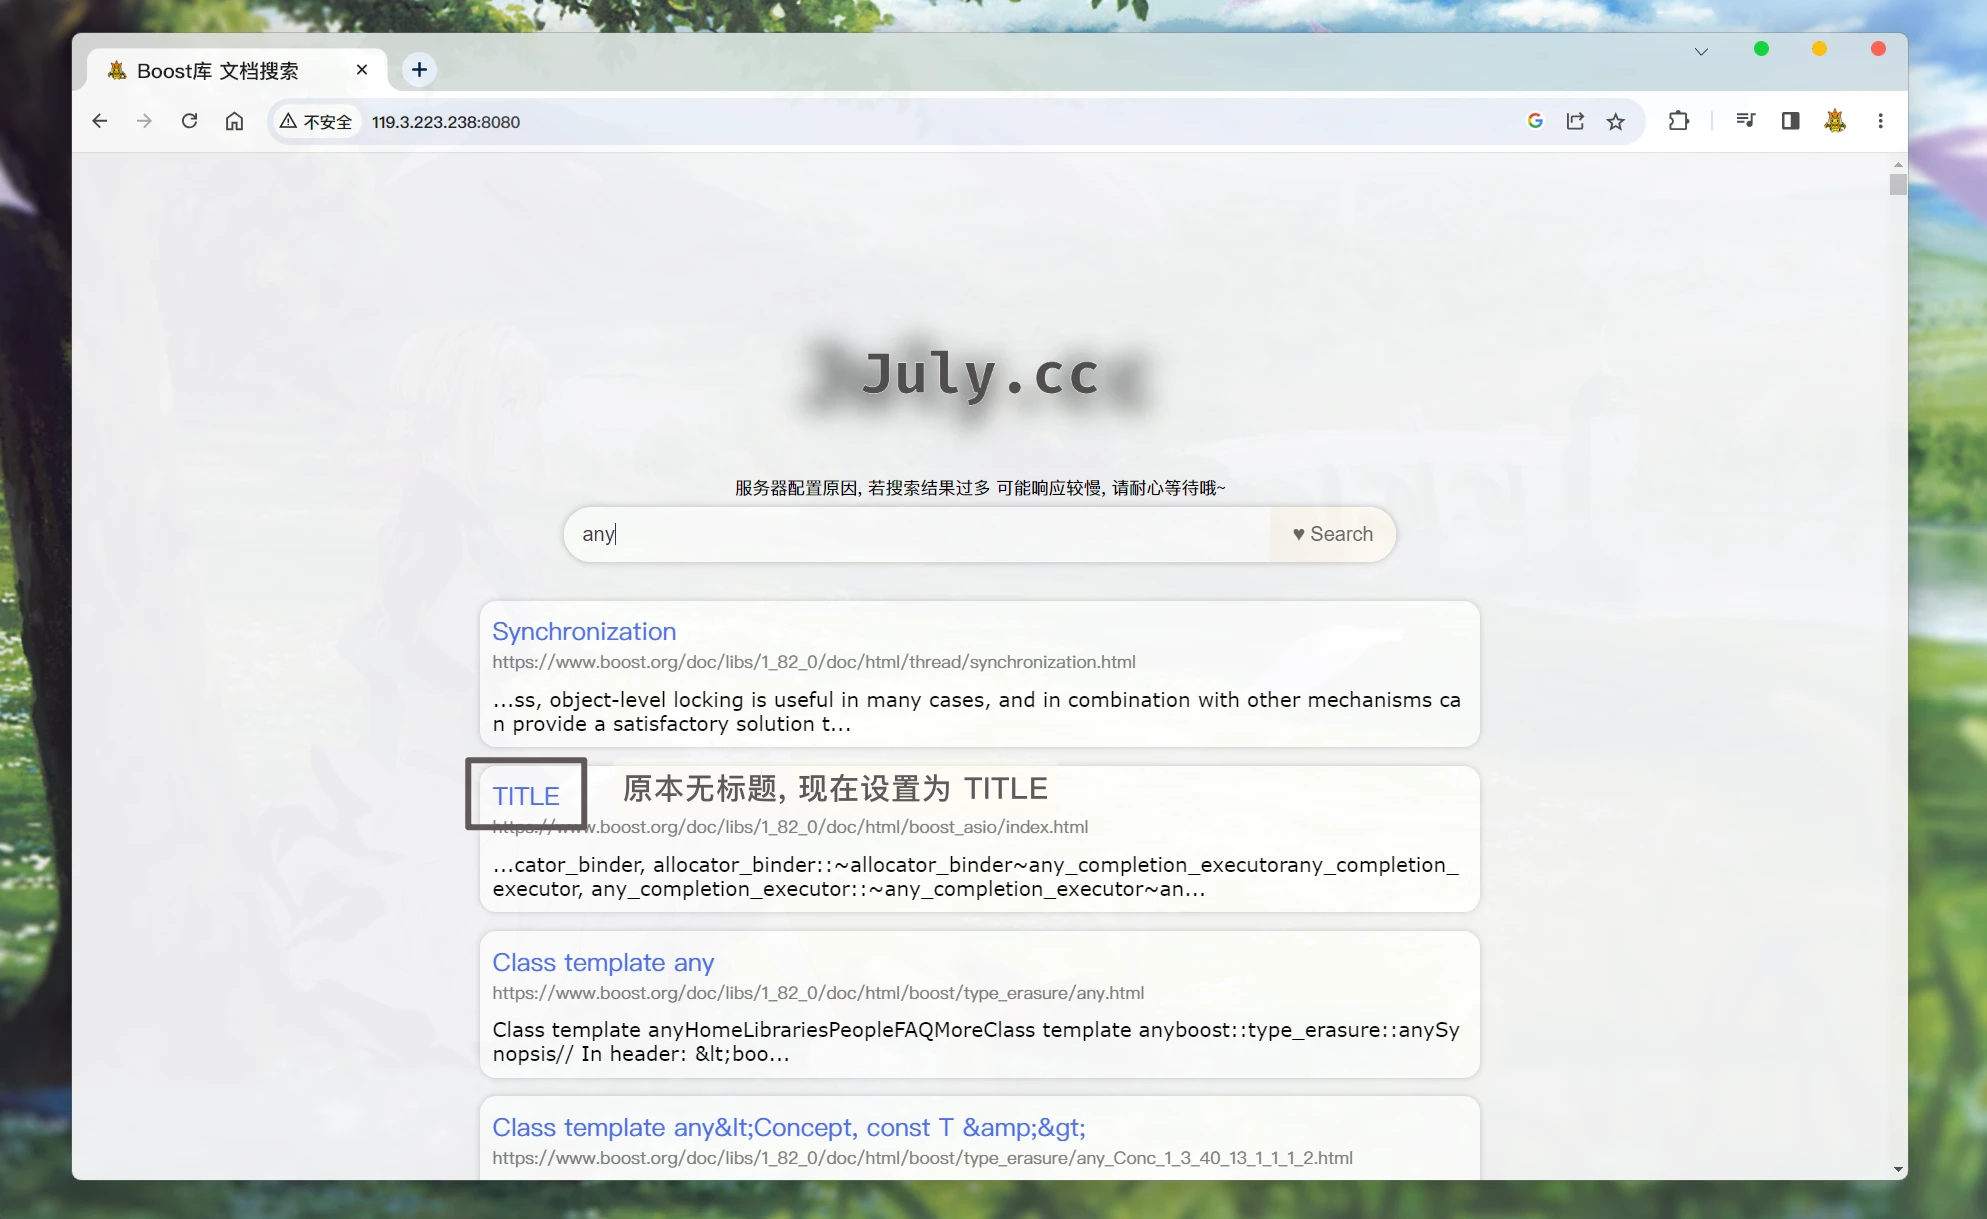
所以, 我们可以考虑修改搜索时获取标题的代码:
CPP12345678910111213141516171819202122232425262728293031323334353637/* searcher.hpp */ Json::Value root; if (allInvertedElemOut.empty()) { Json::Value elem; elem["url"] = "119.3.223.238:8080"; elem["title"] = "Search nothing!"; // 关于文档的内容, 搜索结果中是不展示文档的全部内容的, 应该只显示包含关键词的摘要, 点进文档才显示相关内容 // 而docInfo中存储的是文档去除标签之后的所有内容, 所以不能直接将 doc._content 存储到elem对应key:value中 elem["desc"] = "Search nothing!"; root.append(elem); } else { for (auto& elemOut : allInvertedElemOut) { // 通过Json::Value 对象, 存储文档内容 Json::Value elem; // 通过elemOut._docId 获取正排索引中 文档的内容信息 ns_index::docInfo_t* doc = _index->getForwardIndex(elemOut._docId); // elem赋值 elem["url"] = doc->_url; elem["title"] = doc->_title; if (doc->_title.empty()) { // 如果无标题, 将标题设置为TITLE elem["title"] = "TITLE"; } // 关于文档的内容, 搜索结果中是不展示文档的全部内容的, 应该只显示包含关键词的摘要, 点进文档才显示相关内容 // 而docInfo中存储的是文档去除标签之后的所有内容, 所以不能直接将 doc._content 存储到elem对应key:value中 elem["desc"] = getDesc(doc->_content, elemOut._keywords[0]); // 只根据第一个关键词来获取摘要 // for Debug // 这里有一个bug, jsoncpp 0.10.5.2 是不支持long或long long 相关类型的, 所以需要转换成 double // 这里转换成 double不会有什么影响, 因为这两个参数只是本地调试显示用的. elem["docId"] = (double)doc->_docId; elem["weight"] = (double)elemOut._weight; root.append(elem); } }然后, 再搜索:
我们之前为了方便观测调试, 把文档的
docId和weight也存储并发送了. 现在可以去除在使用
parser模块处理文档html文件的时候, 有三个符号被转换成了编码<: <>: >&: &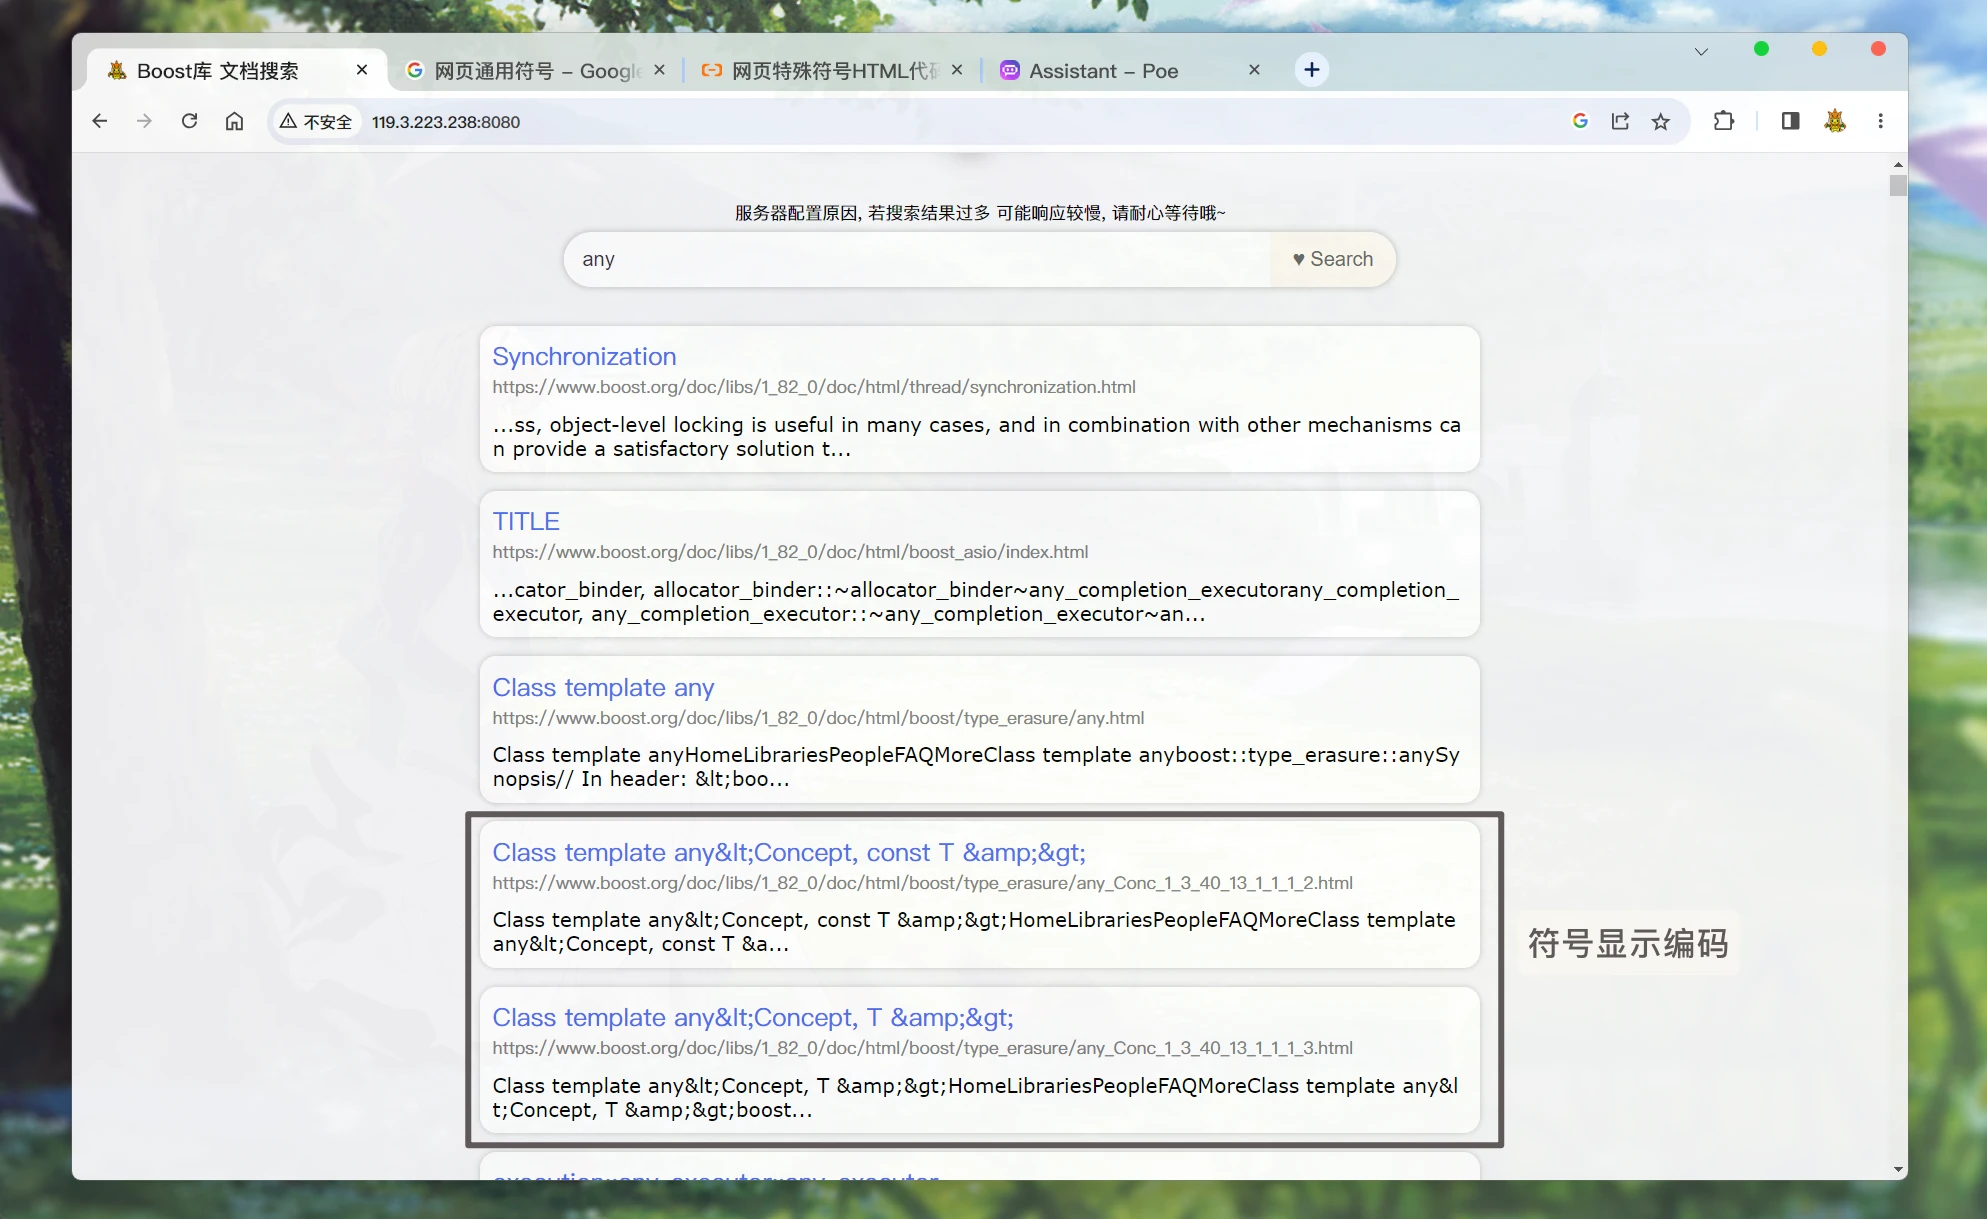
搜索的结果在页面中显示的时候,
<>&符号会以编码的形式显示. 所以我们可以在构建结果的的时候, 再将其转换回去:CPP1234567891011121314151617181920212223242526/*index.html*/ for (let elem of data) { // console.log(elem.title); // console.log(elem.url); let a_lable = $("<a>", { text: elem.title.replace(/</g, "<").replace(/>/g, ">").replace(/&/g, "&"), href: elem.url, // 跳转到新的页面 target: "_blank", }); let i_lable = $("<i>", { text: elem.url, }); let p_lable = $("<p>", { text: elem.desc.replace(/</g, "<").replace(/>/g, ">").replace(/&/g, "&"), }); let div_lable = $("<div>", { class: "item", }); a_lable.appendTo(div_lable); i_lable.appendTo(div_lable); p_lable.appendTo(div_lable); div_lable.appendTo(result_lable); }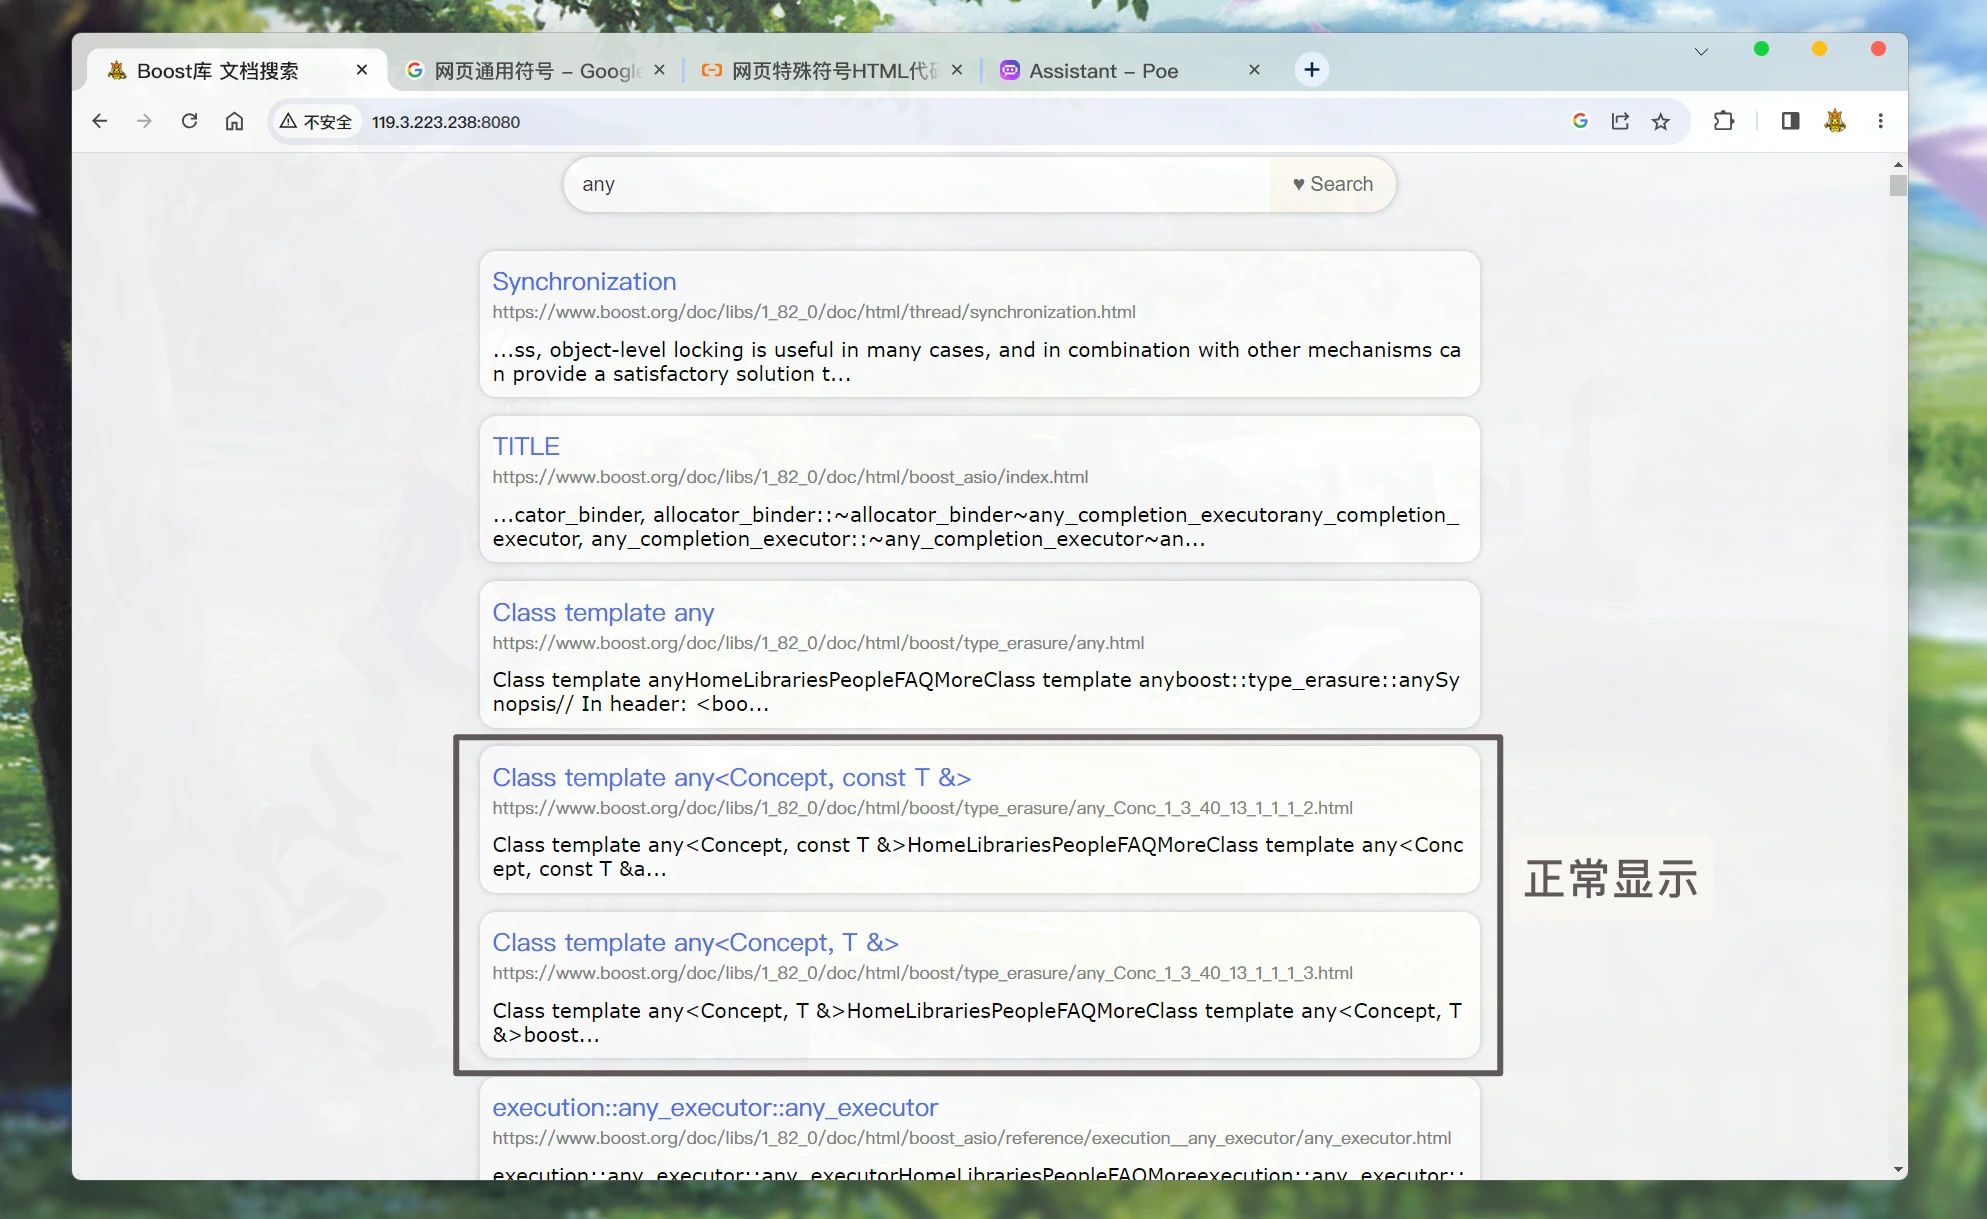
添加日志 并 部署服务器 Link to 添加日志 并 部署服务器
这部分涉及到守护进程相关内容, 建议阅读博主文章了解:
直接在项目中引入两个文件, 这两个文件都是之前实现过 只不过做了一点点修改的. 很简单:
logMessage.hpp:
123456789101112131415161718192021222324252627282930313233343536373839404142434445464748495051525354555657585960616263646566676869707172737475767778798081828384858687888990919293949596979899/* 日志相关 */
#pragma once
#include <cassert>
#include <cerrno>
#include <cstdarg>
#include <cstdio>
#include <cstdlib>
#include <cstring>
#include <ctime>
#include <fcntl.h>
#include <sys/stat.h>
#include <sys/types.h>
#include <unistd.h>
// 宏定义 四个日志等级
#define DEBUG 0
#define NOTICE 1
#define WARNING 2
#define FATAL 3
#define LOGFILEPATH "serverLog.log"
const char* log_level[] = {"DEBUG", "NOTICE", "WARNING", "FATAL"};
class log {
public:
log()
: _logFd(-1) {}
void enable() {
umask(0);
_logFd = open(LOGFILEPATH, O_WRONLY | O_CREAT | O_APPEND, 0666);
assert(_logFd != -1);
dup2(_logFd, STDOUT_FILENO);
dup2(_logFd, STDERR_FILENO);
}
~log() {
if (_logFd != -1) {
// 将系统缓冲区内容刷入文件
fsync(_logFd);
close(_logFd);
}
}
private:
int _logFd;
};
#define LOG(LEVEL, MESSAGE, ...) logMessage(LEVEL, (__FILE__), (__LINE__), MESSAGE, ##__VA_ARGS__)
// 实现一个 可以输出: 日志等级、日志时间、用户、以及相关日志内容的
// 日志消息打印接口
void logMessage(int level, const char* file, int line, const char* format, ...) {
// 通过可变参数实现, 传入日志等级, 日志内容格式, 日志内容相关参数
// 确保日志等级正确
assert(level >= DEBUG);
assert(level <= FATAL);
// 获取当前用户名
char* name = getenv("USER");
// 简单的定义log缓冲区
char logInfo[1024];
// 定义一个指向可变参数列表的指针
va_list ap;
// 将 ap 指向可变参数列表中的第一个参数, 即 format 之后的第一个参数
va_start(ap, format);
// 此函数 会通过 ap 遍历可变参数列表, 然后根据 format 字符串指定的格式,
// 将ap当前指向的参数以字符串的形式 写入到logInfo缓冲区中
vsnprintf(logInfo, sizeof(logInfo) - 1, format, ap);
// ap 使用完之后, 再将 ap置空
va_end(ap); // ap = NULL
// 通过判断日志等级, 来选择是标准输出流还是标准错误流
FILE* out = (level == FATAL) ? stderr : stdout;
// 获取本地时间
time_t tm = time(nullptr);
struct tm* localTm = localtime(&tm);
char* localTmStr = asctime(localTm);
char* nC = strstr(localTmStr, "\n");
if (nC) {
*nC = '\0';
}
fprintf(out, "%s | %s | %s | %s | %s:%d\n", log_level[level], localTmStr,
name == nullptr ? "unknow" : name, logInfo, file, line);
// 将C缓冲区的内容 刷入系统
fflush(out);
// 将系统缓冲区的内容 刷入文件
fsync(fileno(out));
}
daemonize.hpp:
12345678910111213141516171819202122232425262728293031323334353637/* 守护进程接口 */
#pragma once
#include <cstdio>
#include <fcntl.h>
#include <iostream>
#include <signal.h>
#include <sys/stat.h>
#include <sys/types.h>
#include <unistd.h>
void daemonize() {
int fd = 0;
// 1. 忽略SIGPIPE
signal(SIGPIPE, SIG_IGN);
// 2. 改变工作路径
// chdir(const char *__path);
// 3. 不要成为进程组组长
if (fork() > 0) {
exit(0);
}
// 4. 创建独立会话
setsid();
// 重定向文件描述符0 1 2
if ((fd = open("/dev/null", O_RDWR)) != -1) { // 执行成功fd大概率为3
dup2(fd, STDIN_FILENO);
dup2(fd, STDOUT_FILENO);
dup2(fd, STDERR_FILENO);
// dup2三个标准流之后, fd就没有用了
if (fd > STDERR_FILENO) {
close(fd);
}
}
}
在项目中引入这两个文件之后, 就可以将httpServer.cc设置为守护进程.
并将 整个项目中所有向标准输出和标准错误打印日志的信息, 都改为LOG(LEVEL, MESSAGE, ...)形式 向文件中打印日志:
123456789101112131415161718192021222324252627282930313233343536373839404142434445464748495051525354#include <iostream>
#include <pthread.h>
#include "util.hpp"
#include "daemonize.hpp"
#include "searcher.hpp"
#include "logMessage.hpp"
#include "httplib.h"
const std::string& input = "./data/output/raw";
const std::string& rootPath = "./wwwRoot";
int main() {
// 守护进程设置, 部署服务器
daemonize();
// 日志系统
class log logSvr;
logSvr.enable();
ns_searcher::searcher searcher;
searcher.initSearcher(input);
httplib::Server svr;
svr.set_base_dir(rootPath.c_str());
svr.Get("/s", [&searcher](const httplib::Request& request, httplib::Response& response) {
// 首先, 网页发起请求 如果需要带参数, 则是需要以 key=value的格式在url中 或者 正文有效中传参的
// 就像我们使用一般搜索引擎搜索一样:
// 如果在 google搜索http, 那么 url就会变为 https://www.google.com/search?q=http&sxsrf=AB5stBgDxDV91zrABB
// 其中 q=http 就是一对 key=value 值, 而 httplib::Request::has_param() 就是识别请求url中是否携带了 某个key=value
// 本项目中, 我们把搜索内容 的key=value对, 设置为word=搜索内容
if (!request.has_param("word")) {
// url中没有 word 键值
// set_content() 第一个参数是设置正文内容, 第二个参数是 正文内容类型等属性
response.set_content("请输入内容后搜索", "text/plain; charset=utf-8");
}
std::string searchContent = request.get_param_value("word");
LOG(NOTICE, "User search:: %s", searchContent.c_str()); // 调用LOG()
// std::cout << "User search:: " << searchContent << std::endl;
std::string searchJsonResult;
searcher.search(searchContent, &searchJsonResult);
// 搜获取到搜索结果之后 设置相应内容
response.set_content(searchJsonResult, "application/json");
});
// svr.Get("/hi", [](const httplib::Request&, httplib::Response& res) {
// res.set_content("Hello World!", "text/plain");
// });
LOG(NOTICE, "服务器启动成功...");
// std::cout << "服务器启动成功..." << std::endl;
svr.listen("0.0.0.0", 8080);
return 0;
}
执行了daemonize()之后, 服务器就会变成守护进程. 只要服务器主机不关机 或者 不主动kill掉进程. 服务就会一直在后台运行. 所有人都可以随时随地访问.
欢迎访问: Boost库 文档搜索
项目的完整目录结构 以及 完整代码 展示 Link to 项目的完整目录结构 以及 完整代码 展示
目录结构 Link to 目录结构
1234567891011121314151617181920212223242526272829303132333435363738❯ pwd
/home/July/gitCode/gitHub/Boost-Doc-Searcher
❯ tree -L 3
.
├── cppjieba
│ ├── DictTrie.hpp
│ ├── ...(jieba库相关头文件)
│ └── Unicode.hpp
├── cppjiebaDict
│ ├── hmm_model.utf8
│ ├── ...(jieba库提供的分词库)
│ └── user.dict.utf8
├── daemonize.hpp
├── data
│ ├── input
│ │ ├── about.html
│ │ ├── ...(Boost库文档文件)
│ │ └── yap.html
│ └── output
│ └── raw
├── httplib.h
├── httpServer.cc
├── index.hpp
├── LICENSE
├── logMessage.hpp
├── makefile
├── parser
├── parser.cc
├── README.md
├── searcher.hpp
├── searcherServerd
├── serverLog.log
├── util.hpp
└── wwwRoot
├── favicon.svg
└── index.html
64 directories, 287 files
完整代码 Link to 完整代码
整个项目的完整代码已提交至Github: https://github.com/DxytJuly3/Boost-Doc-Searcher
欢迎收藏使用~
本篇文章至此结束. 但此项目还有扩展内容, 可以关注一下专栏等待后续更新~
感谢阅读~